Introduction
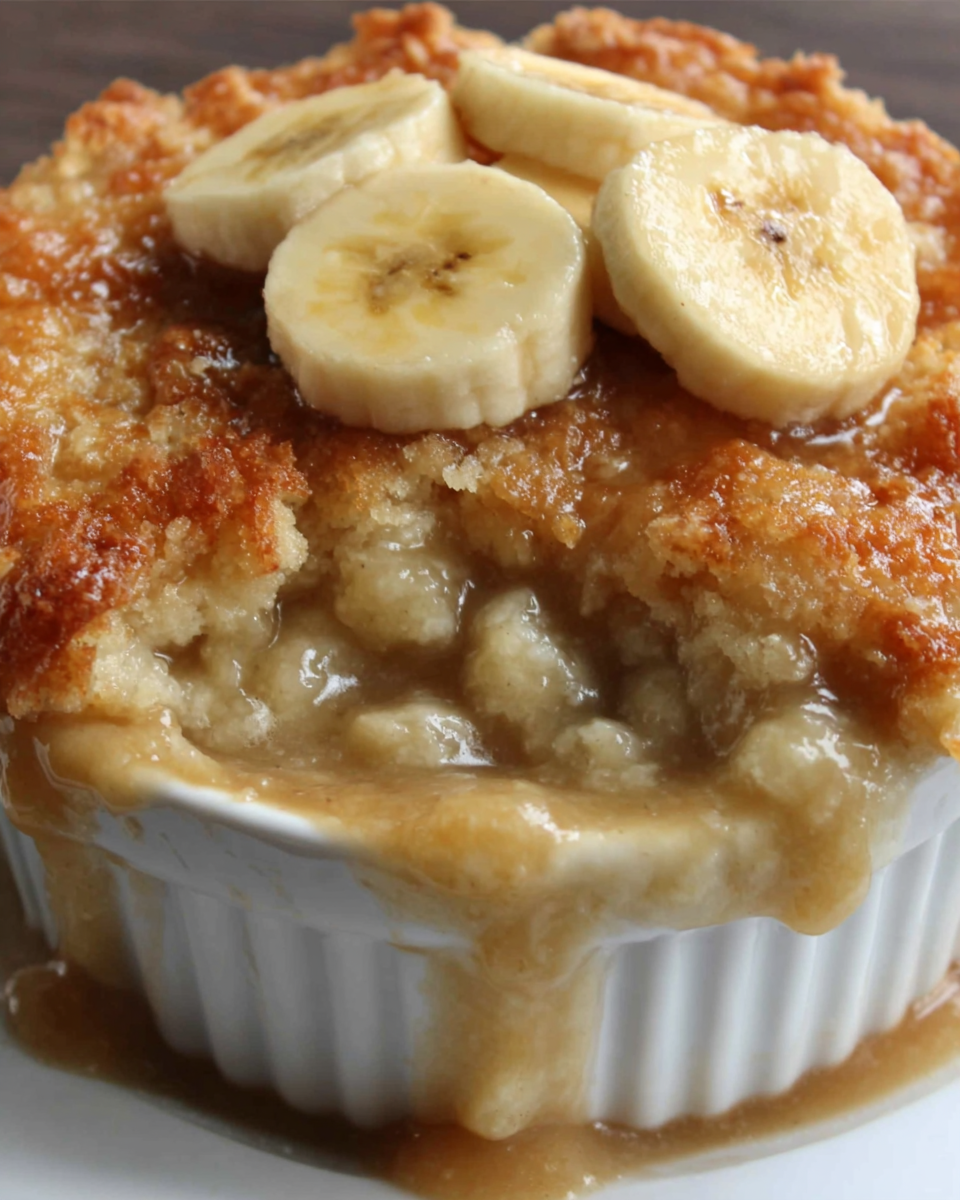
There's something incredibly comforting about a warm, fruity dessert, and Southern banana cobbler delivers just that. This dish takes ripe bananas and transforms them into a delightful, slightly gooey filling, all encased in a buttery cobbler crust.
Whether you're looking to impress guests or simply indulge in a sweet treat, this recipe is a celebration of Southern flavors that evokes nostalgia with every bite. With expert tips at hand, you'll be crafting the perfect banana cobbler in no time.
Ingredients
- 4 ripe bananas, sliced
Ripe bananas bring natural sweetness and a soft texture that infuses the cobbler with flavor. Ideally, they should have brown spots to ensure they're at peak sweetness, contributing to a rich, caramel-like taste. - 1 cup granulated sugar
Granulated sugar is essential for sweetening the banana filling and enhances the cobbler crust's flavor. Adjusting the sugar can help control the overall sweetness, complementing the bananas' natural sugars. - 2 tablespoons lemon juice
Lemon juice balances out the sweetness of the bananas, preventing the dish from becoming overwhelmingly sweet. It also adds a hint of acidity that enhances the overall flavor profile. - 3/4 cup all-purpose flour
Flour provides the structural base for the cobbler topping. It creates a light and fluffy texture when mixed with other ingredients, ensuring a satisfying contrast to the soft banana filling. - 1 tablespoon baking powder
Baking powder is a leavening agent that ensures the cobbler topping rises nicely during baking. This adds a lightness to the crust, making it easy to scoop and enjoy. - 1/2 teaspoon salt
Salt enhances the overall flavors of the cobbler, balancing sweetness and enriching the banana and crust flavors. It’s a small addition, but its effect on taste is significant. - 1/2 cup milk
Milk hydrates the dry ingredients in the cobbler topping, helping to create a smooth batter. It also adds a rich flavor, resulting in a tender crust. - 1/4 cup unsalted butter, melted
Melted butter enriches the cobbler topping, providing flavor and moisture. It contributes to that sought-after golden hue and helps the cobbler to crisp up beautifully on the outside. - 1 teaspoon vanilla extract
Vanilla extract adds a warm, aromatic flavor that enhances the overall sweetness of the cobbler. It's a great way to elevate the dish, giving it depth and character.
Directions & Preparation
Step 1: Preheat the oven to 350°F (175°C).
Preheating the oven is crucial for achieving an even baking temperature. This step ensures that when your cobbler goes in, it starts cooking immediately, leading to the perfect texture of the crust. An adequately preheated oven means a beautiful golden top and well-cooked filling.
Step 2: Prepare the banana filling by mixing sliced bananas, sugar, and lemon juice in a bowl.
This step allows the bananas to macerate in the sugar and lemon juice, which helps to draw out their juices. The result is a sweet and tangy filling that forms the base of your cobbler. Allow it to sit for about 10 minutes while you prepare the topping.
Step 3: In a separate bowl, whisk together the flour, baking powder, salt, and sugar.
Mixing the dry ingredients thoroughly ensures an even distribution of the leavening agent, sugar, and salt. Uneven mixing can lead to inconsistencies in flavor and texture in your finished cobbler. This step lays the foundation for a well-risen, fluffy topping.
Step 4: Stir in the milk, melted butter, and vanilla until just combined.
Combining the wet and dry ingredients should be done gently to avoid overmixing, which can make the crust tough. Stir until the ingredients are just combined, leaving some lumps. This technique is key to achieving the desired texture in your cobbler topping.
Step 5: Pour the banana filling into a greased baking dish.
Make sure to use a suitable baking dish that can withstand the oven heat. Pouring the filling first allows the batter you just made to be spooned over it, creating a layered effect. This helps in developing a gorgeous contrast between the gooey filling and fluffy topping.
Step 6: Spoon the batter over the banana filling evenly.
Using a spoon to dollop the batter ensures an even distribution over the filling, which is essential for uniform cooking. This method helps the topping to rise and brown nicely, forming a beautifully textured crust that complements the soft banana layer underneath.
Step 7: Bake for 40–45 minutes until golden brown.
Baking the cobbler at the right temperature and timeframe is crucial. This step allows the chemistry of the ingredients to come together, while the golden brown color indicates that the topping has cooked through. Ensure the center is set by giving it a gentle shake; it should be firm but not too jiggly.
Step 8: Let the cobbler cool for at least 10 minutes before serving.
Cool down time allows the filling to set slightly, making it easier to serve. The residual heat softens the crust further, marrying the flavors together beautifully. This waiting period enhances the overall eating experience.

Balancing Sweetness with Acidity
The interplay of sweetness from ripe bananas with the acidity from lemon juice is a hallmark of this cobbler. This balance prevents the dessert from becoming overly sweet, allowing the nuanced flavors of both the fruit and dessert to shine. The acidity cuts through the richness, making each bite refreshing and enjoyable, ensuring it’s not just a sugar overload.
Choosing the Right Bananas
Selecting the right type of bananas is essential for this cobbler's success. Look for bananas that are spotty and just beginning to brown, as they provide the best sweetness and flavor. Avoid overly soft or bruised bananas; you want them to hold their shape while still providing that wonderful banana essence that permeates the cobbler.
Perfecting the Cobbler Crust
The cobbler crust is where many home cooks find the most joy and sometimes confusion. Achieving a perfectly baked crust that is golden on top yet soft on the bottom takes some practice. By carefully monitoring the baking process and using the right amount of milk and butter, you can create a tender, flaky crust that complements the luscious banana filling beautifully.
FAQs
What if my banana filling turns out too runny?
If the filling is too runny, consider adding a touch more flour to thicken it up during preparation. You can also allow it to sit a bit longer, letting the bananas release their juices gradually.
How can I ensure my cobbler crust is flaky?
Ensuring your butter is cold when you mix it with the dry ingredients can help achieve a flaky texture. Avoid overmixing once the wet ingredients are added, as this can lead to a denser crust.
Can I substitute whole milk with a dairy-free alternative?
Yes, you can substitute whole milk with a dairy-free alternative like almond milk or oat milk without affecting the overall structure of the cobbler.
What should I do if my cobbler edges are burning before the center is done?
To prevent burning, consider covering the edges with foil during baking if they brown too quickly while the center continues to cook. This method shields the crust while allowing the filling to set properly.
Can I use frozen bananas for this recipe?
It’s best to use fresh bananas for the cobbler to achieve the desired consistency and flavor. Frozen bananas tend to be mushy and may release too much moisture.
How can I adjust the sweetness of the cobbler?
To control the sweetness, you can reduce the amount of sugar used in the filling or opt for slightly less ripe bananas. Taste the mixture before baking to ensure it meets your preference.
Conclusion
Creating a Southern banana cobbler is not just about following a recipe; it’s about celebrating flavors and heritage. The comforting aroma that fills your kitchen as this dish bakes is almost as delightful as the first bite.
With a balance of sweet, tangy, and buttery notes, this cobbler is perfect for any occasion. Share it with loved ones or savor it alone; either way, you're bound to fall in love with this scrumptious treat.
Recipe Card

Comforting Fall Dinner Ideas for Cozy Nights
Ingredients
- butternut squash 1 medium
- chicken thighs 4 pieces
- onion 1 large, diced
- garlic 4 cloves, minced
- vegetable broth 4 cups
- sage 1 tablespoon, chopped
- heavy cream 1 cup
- grated Parmesan cheese 1/2 cup
- spinach 3 cups, fresh
- cinnamon 1/2 teaspoon
Instructions
- Preheat your oven to 400°F (200°C).
- Peel and cube the butternut squash into 1-inch pieces.
- In a large skillet, heat oil over medium heat and sauté the diced onion until translucent.
- Add minced garlic and chopped sage to the skillet, cooking for an additional minute.
- Toss in the cubed butternut squash and sauté for 5-7 minutes.
- Transfer the mixture to a baking dish and nestle the chicken thighs among the vegetables.
- Pour vegetable broth over the ingredients and sprinkle with salt and pepper to taste.
- Cover with foil and bake for 35 minutes, then remove the foil and bake for an additional 15-20 minutes.
- During the last 10 minutes, stir in fresh spinach and heavy cream, topping with Parmesan cheese.
- Serve hot, garnished with extra sage if desired.
Notes
Additional serving suggestions: pair with a crisp salad, garlic bread, or roasted seasonal vegetables for balance.
For make-ahead, prep components separately and assemble just before heating to preserve texture.
Taste and adjust with acid (lemon/vinegar) and salt right at the end to wake up flavors.


