Introduction
As the holiday season approaches, the aroma of freshly baked bread fills the air, evoking warmth and comfort that draws friends and family together. Festive Christmas bread is more than just a treat; it's a centerpiece that adds a sense of occasion to any gathering, bringing joy with each slice.
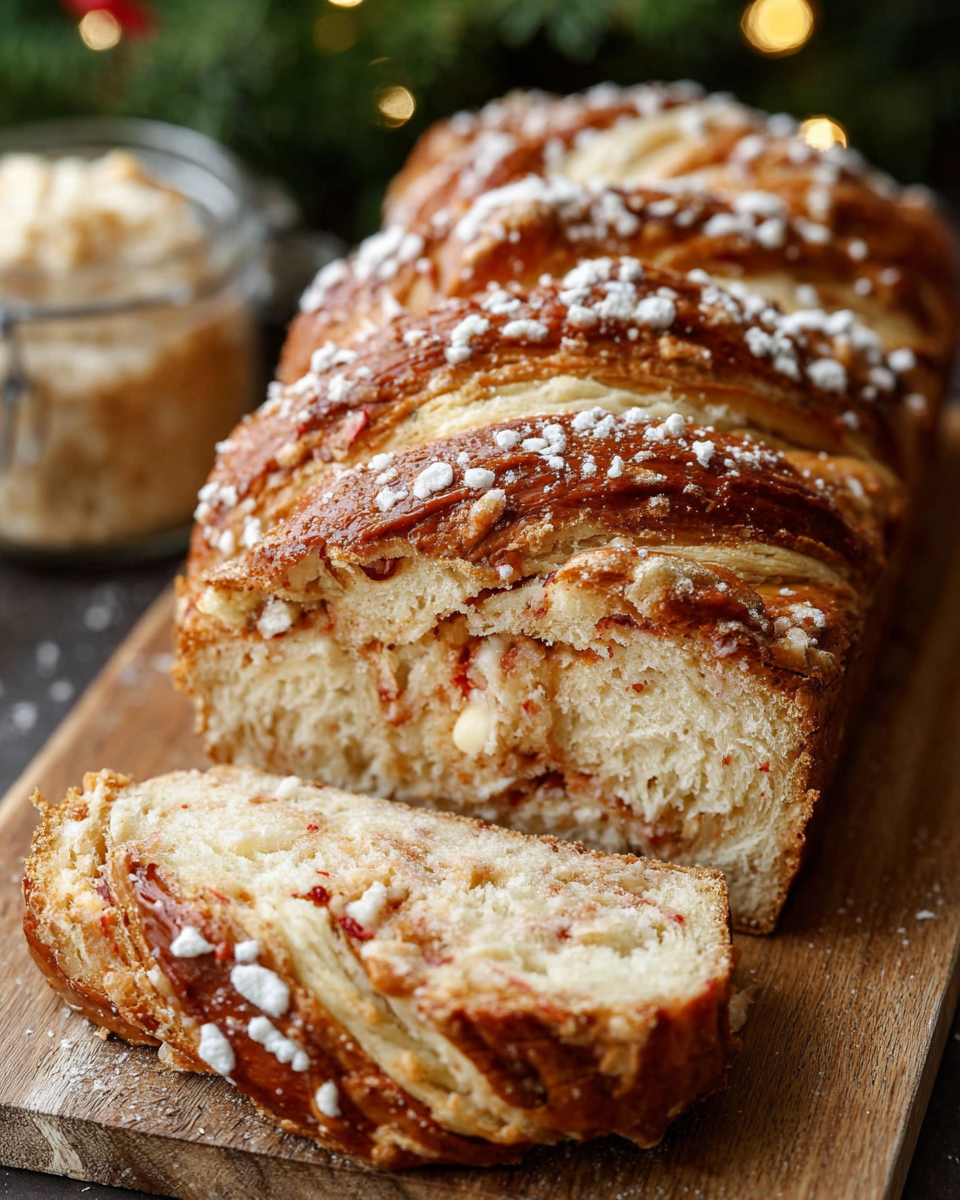
This soft, sweet bread often incorporates delightful spices and colorful add-ins that embody the spirit of the season. From the moment you mix the dough to the time you pull the golden loaves from the oven, this recipe is an invitation to create cherished memories and indulgent moments.
Whether you're enjoying it during breakfast or serving it as dessert, festive Christmas bread is a delightful way to celebrate the holidays. Join me in exploring the rich flavors and festive looks of this cozy favorite.
Ingredients
- 4 cups all-purpose flour
All-purpose flour serves as the foundation for your bread, providing the necessary structure through gluten development. It absorbs moisture, helping the bread to rise and create a soft, inviting texture. - 1 cup milk
Milk adds richness and moisture to the dough, fostering tenderness. It also contributes to browning during baking, giving the crust a beautiful golden color and enhancing the overall flavor profile. - 1/2 cup granulated sugar
Sugar not only sweetens the bread, making it a delightful treat but also helps activate the yeast and promotes a lovely golden crust. It balances the flavors of spices and enriches the sensory experience. - 1/4 cup unsalted butter, softened
Butter introduces a rich flavor and tender crumb texture to the bread. Its fat content aids in moisture retention, allowing the bread to stay soft for longer, which is especially enjoyable during the festive season. - 2 large eggs
Eggs act as a binding agent, providing structure while enhancing the bread's flavor and richness. They also contribute to a beautiful golden hue in the final loaf and help retain moisture. - 1 packet (2 1/4 tsp) active dry yeast
Yeast is essential for leavening, allowing the bread to rise and achieve that airy texture. When combined with sugar, it ferments and produces carbon dioxide, making the dough expand beautifully. - 1 teaspoon cinnamon
Cinnamon adds a warm, aromatic flavor that evokes holiday cheer. Its sweet and spicy notes enhance the overall festive taste of the bread, transforming it into a seasonal favorite. - 1/2 teaspoon nutmeg
Nutmeg complements cinnamon with its warm, slightly sweet aroma, enriching the bread's flavor profile. Just a hint can evoke the essence of Christmas, grounding its festive character. - 1/2 teaspoon salt
Salt not only enhances the flavors of the other ingredients but also strengthens gluten structure, improving the bread's overall texture. It balances the sweetness, making each bite more satisfying. - 1/2 cup dried fruits (such as cranberries or raisins)
Dried fruits provide bursts of sweetness and texture within the bread. They introduce vibrant color and visual appeal, making the bread not only tasty but also beautiful for any festive table. - 1/4 cup chopped nuts (optional)
Nuts add a delightful crunch and buttery flavor that pairs well with the soft bread. They also contribute healthy fats and proteins, enriching the overall nutritional value of your festive creation.
Directions & Preparation
Step 1: Activate the yeast.
In a small bowl, combine the warm milk and sugar, and sprinkle the yeast over the top. Allow it to sit for about 5–10 minutes until it becomes foamy. This step is crucial because it ensures your yeast is active and ready to make the bread rise. If the mixture doesn't foam, the yeast might be expired, and you'll need to start over for successful rising.
Step 2: Mix the dry ingredients.
In a large mixing bowl, whisk together the all-purpose flour, cinnamon, nutmeg, and salt. Mixing these dry components ahead of time ensures a more uniform distribution of flavors and helps to prevent clumping when combined with wet ingredients, leading to even more flavorful bread.
Step 3: Combine wet ingredients.
In a separate bowl, beat the softened butter and sugar until light and fluffy. Then blend in the eggs and activated yeast mixture. This creaminess contributes to the bread's moistness and texture, ensuring that your finished loaf will have a rich taste and a soft crumb.
Step 4: Combine wet and dry mixtures.
Gradually add the dry mixture to the wet ingredients, stirring until a dough forms. It's essential to achieve the right consistency; you want a slightly sticky dough that can be easily kneaded. Gently incorporate the dried fruits and nuts if using, ensuring that they are evenly distributed throughout the dough for added flavor and texture.
Step 5: Knead the dough.
Turn the dough out onto a floured surface and knead it for about 8–10 minutes until it is smooth and elastic. Kneading is a vital process that develops gluten structure, which is crucial for the rise and texture of your bread. Observing the dough's elasticity while kneading is a great cue that it's ready for the next stage.
Step 6: Let the dough rise.
Place the kneaded dough in a greased bowl, cover it with a damp cloth, and let it rise in a warm environment until it doubles in size, about 1 to 2 hours. This resting stage allows fermentation to occur, improving flavor and helping to create a light, airy texture in your bread.
Step 7: Shape the dough.
Once the dough has risen sufficiently, punch it down gently to release the air. Divide and shape the dough into your desired loaf shape, whether a braid or a round. This shaping not only creates beautiful visual appeal but also helps to redistribute the yeast, ensuring consistent texture and flavor across your bread.
Step 8: Second rise.
Place the shaped dough onto a greased baking sheet or into prepared loaf pans and let it rise again until it puffs up for about 30–45 minutes. The second rise is essential in achieving a light and fluffy texture, especially after the dough has been shaped and handled, allowing it to recover and expand.
Step 9: Preheat the oven.
While the dough undergoes its second rise, preheat the oven to 350°F (175°C). Starting with a properly heated oven is key to achieving a perfect rise and golden crust, ensuring that you get the best results when it comes to baking your festive Christmas bread.
Step 10: Bake the bread.
Once the dough has risen again, place it in the preheated oven and bake for approximately 25–30 minutes or until the bread is golden on top and sounds hollow when tapped on the bottom. Monitoring the baking process is vital, as every oven varies; you can rotate the bread halfway through for even color and cooking.
Step 11: Cool and serve.
After baking, remove the bread from the oven and let it cool on a wire rack. This step helps to prevent sogginess and allows the bread to retain its shape. Finally, slice and serve it warm or at room temperature to fully appreciate its flavors and celebrate the holiday spirit.

Customizing Your Festive Bread
One of the joys of baking festive Christmas bread is the ability to customize it to your tastes. Offering variations from adding citrus zest to incorporating flavored extracts like almond or vanilla can elevate your creation. Feel free to experiment with different dried fruits and nuts; dried apricots or walnuts can give your bread a unique twist.
The Art of Shaping Bread
Shaping the dough can be a fun and creative process. Consider braiding the dough for an elegant presentation or rolling it into a traditional round loaf for a classic look. Each method showcases the bread's inviting aroma, and how you shape it can affect the overall texture, adding to the specialness of your festive moments.
Pairing Festive Christmas Bread
This bread pairs beautifully with holiday spreads, cheeses, or a simple pat of butter. Consider serving it alongside seasonal beverages, like spiced cider or rich hot chocolate, which enhance the whole experience. A warm slice can provide a perfect complement to holiday gatherings, igniting connections over shared tastes and flavors.
FAQs
What can I do if my dough is too sticky?
If your dough is too sticky, lightly dust your work surface and your hands with flour while kneading. This helps prevent sticking without incorporating too much extra flour, which could alter the texture of your bread.
Can I make this bread with whole wheat flour?
Yes, you can substitute part of the all-purpose flour with whole wheat flour for a heartier texture. However, you may need to adjust the liquid quantities slightly, as whole wheat flour absorbs more moisture.
What can I do if my bread doesn’t rise properly?
If your bread doesn't rise, it might indicate inactive yeast or that the environment is too cold. Ensure the yeast is fresh, and during the rise, keep the dough in a warm spot, such as near a preheated oven.
Can I add chocolate chips to this recipe?
Absolutely! Adding chocolate chips can give your festive bread a delightful twist. Simply fold them into the dough along with the nuts and dried fruits for a rich flavor contrast.
How do I check if my bread is done baking?
To check if your bread is done, you can tap the bottom; it should sound hollow. Alternatively, an internal temperature of around 190°F (88°C) indicates perfect doneness.
Can I use melted butter instead of softened butter?
While you can use melted butter, it may result in a denser loaf. Softened butter creates a fluffier texture by trapping air into the dough during mixing, contributing to a lighter bread.
Conclusion
Festive Christmas bread is not just a recipe; it is an experience, rich with flavors and the warmth of shared moments. With each rise and bake, you create a loaf that brings happiness to your holiday table.
As you gather with loved ones, enjoy the delight and satisfaction this homemade bread offers. Share a slice, ignite conversations, and celebrate the spirit of togetherness this season brings.
Recipe Card

Indulgent Cheesy Garlic Scalloped Potatoes Recipe
Ingredients
- 4 large russet potatoes sliced
- 2 cups heavy cream
- 1 cup shredded sharp cheddar cheese
- 4 cloves of garlic minced
- 1 teaspoon salt
- 1/2 teaspoon black pepper
- 1 tablespoon fresh parsley chopped (optional garnish)
Instructions
- Preheat the oven to 375°F (190°C).
- Prepare the potatoes by washing, peeling, and slicing them thinly.
- In a saucepan, combine heavy cream, minced garlic, salt, and black pepper. Heat gently until just warmed.
- Layer half of the sliced potatoes in a greased baking dish. Pour half of the cream mixture over the potatoes, and sprinkle half of the cheese on top.
- Repeat with the remaining potatoes, cream, and cheese to create a second layer.
- Cover the baking dish with aluminum foil and bake for 45 minutes.
- Remove the foil and bake for an additional 30 minutes, or until the top is golden and bubbly.
- Let the dish cool for 10 minutes before serving, and garnish with fresh parsley if desired.
Notes
Additional serving suggestions: pair with a crisp salad, garlic bread, or roasted seasonal vegetables for balance.
For make-ahead, prep components separately and assemble just before heating to preserve texture.
Taste and adjust with acid (lemon/vinegar) and salt right at the end to wake up flavors.


