Introduction
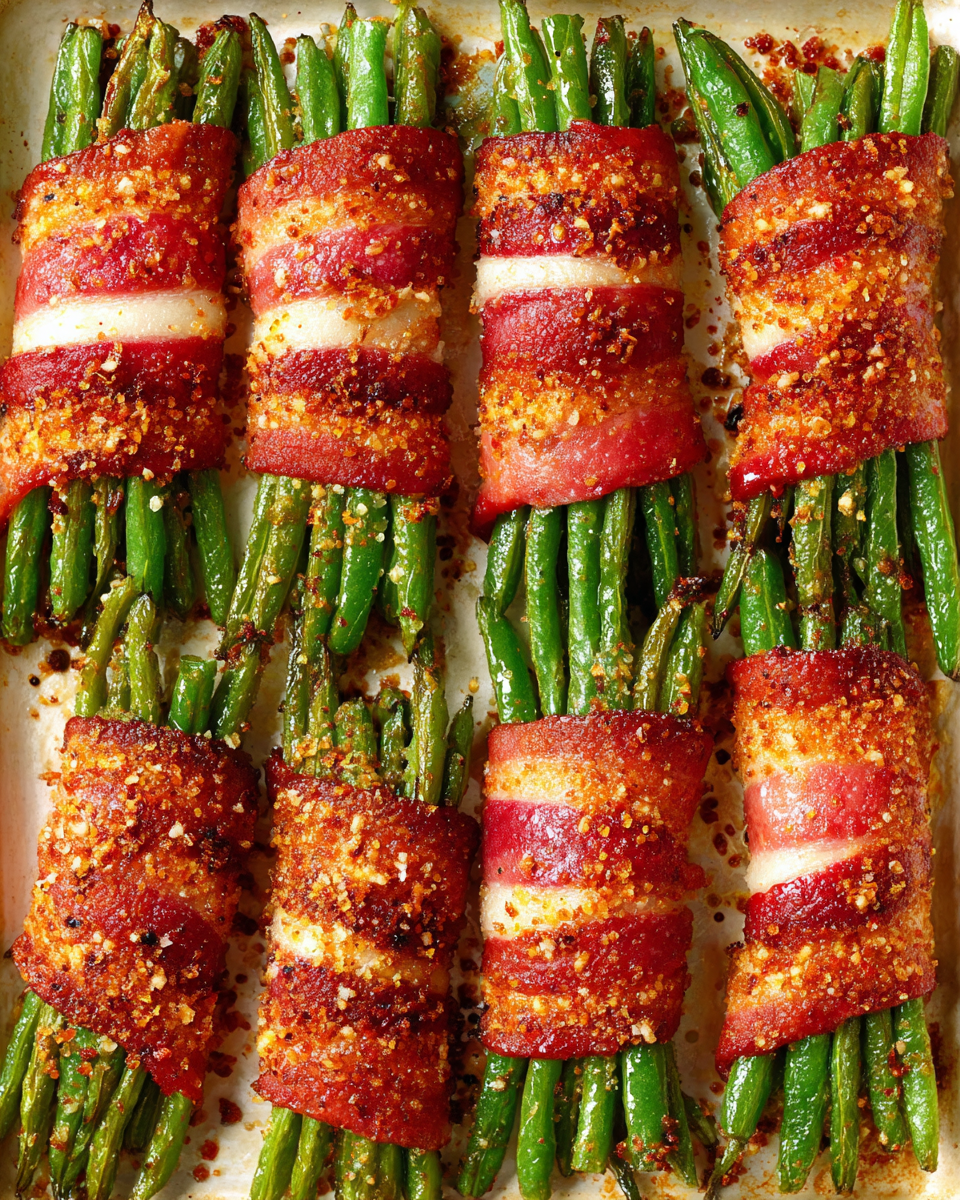
Green bean bundles are a delightful way to elevate your vegetable side dish game. These elegant little treats not only look stunning on the plate but also combine the crisp texture of fresh green beans with the rich flavors of bacon and a hint of garlic.
Perfect for holidays, family gatherings, or cozy dinners, green bean bundles are surprisingly easy to prepare. Wrapped in bacon and seasoned to perfection, they provide a burst of flavor that complements any main course.
In addition to their taste and presentation, these bundles are versatile. Feel free to play with herbs or seasonings based on your menu. Let’s dive into creating a dish that’s sure to impress your guests!
Ingredients
- 1 pound fresh green beans
Fresh green beans serve as the star of this dish, providing a crisp texture and vibrant color. When selecting the beans, look for ones that are bright green and firm. - 8 slices of bacon
Bacon adds a savory, smoky flavor that complements the freshness of the green beans. It also contributes a satisfying crunch when cooked to a crisp. - 2 tablespoons olive oil
Olive oil helps to create a flavorful coating for the bundles and aids in achieving a lovely, golden finish in the oven while also enhancing the dish's overall richness. - 2 cloves garlic, minced
Garlic brings a fragrant, robust flavor to the green bean bundles. As it cooks, it infuses the dish with warmth, elevating the taste significantly. - ½ teaspoon salt
Salt is essential for enhancing the flavors of the ingredients. It pulls out the natural sweetness of the green beans and balances the richness of the bacon. - ¼ teaspoon pepper
Pepper adds a subtle heat and depth to the dish. The combination of salt and pepper ensures a well-seasoned, flavorful experience. - ½ teaspoon dried thyme
Dried thyme introduces an earthy herbaceous note that pairs beautifully with green beans and bacon. It creates an aromatic complexity that enhances the overall dish.
Directions & Preparation
Step 1: Preheat your oven to 400°F (200°C).
Preheating the oven is crucial as it ensures that the bacon will crisp up nicely and the green beans will roast evenly. A hot oven creates that perfect environment to achieve both a tender vegetable and crispy wrapping.
Step 2: Wash and trim the green beans.
Rinsing the green beans removes any dirt or debris. Trimming the ends is essential for a neat appearance and makes them easier to eat. This preparation step ensures that each bundle looks polished and elegant.
Step 3: Take 8–10 green beans and bundle them together.
Grouping the green beans allows for even cooking and presentation. This technique creates a cohesive bundle that will roast uniformly, ensuring that every bite contains both green beans and the delicious bacon.
Step 4: Wrap each bundle with a slice of bacon.
Wrapping the green beans in bacon not only adds flavor but also helps retain moisture during cooking. The bacon will render and flavor the beans, creating a delightful taste sensation. Be sure to wrap snugly, not too tight, allowing some space for expansion.
Step 5: Secure the bundle with a toothpick.
Using a toothpick ensures that the bundles hold together during roasting. This is especially important as the bacon could unravel if not secured properly. Remember to remove the toothpicks before serving for a final touch.
Step 6: Drizzle olive oil over the bundles and season with garlic, salt, pepper, and thyme.
Coating the bundles in olive oil not only adds flavor but also promotes even cooking and browning. Seasoning before roasting enhances the taste, ensuring each bite is flavorful and satisfying.
Step 7: Place the bundles on a baking sheet lined with parchment paper.
Using parchment paper helps prevent sticking and makes for easier cleanup. Spreading the bundles out on a baking sheet allows for even roasting, ensuring the bacon crisps up without crowding.
Step 8: Roast in the preheated oven for 20-25 minutes, or until the bacon is crispy.
Roasting transforms the green beans, softening them while allowing the bacon to crisp. Keep an eye on them, as cooking times may vary based on bacon thickness and oven efficiency.
Step 9: Remove from the oven and let cool slightly before serving.
Allowing the bundles to cool for a few minutes helps set the flavors and makes handling easier. This pause also lets the bacon crisp up even more, enhancing the texture when served.

The Versatility of Flavor
Green bean bundles can easily transition from a holiday table to a weeknight dinner. By experimenting with different herbs or even substituting the bacon for prosciutto or turkey bacon, you can create variations that suit your preferences. Spice lovers might consider adding a sprinkle of red pepper flakes or lemon zest for a unique twist.
A Presentation Worth Celebrating
Beyond taste, green bean bundles are visually stunning. Their neat, wrapped appearance makes them a perfect addition to your serving platter, adding both color and elegance. This makes them a great choice for dinner parties, where first impressions matter, and guests can’t resist snapping pictures before diving in.
Pairing Suggestions for the Perfect Meal
These bundles are incredibly versatile in terms of pairings. They complement roasted meats, hearty stews, and even vegetarian dishes. Consider serving them alongside a seasoned roast chicken or a rich beef tenderloin, as the flavors marry beautifully. They can also stand alone as a tapas-style dish, served with a selection of dips.
FAQs
What type of green beans should I use?
Opt for fresh green beans that are bright green and crisp. Avoid beans that are limp or have blemishes.
Can I use wrapped bundles with different meats?
Yes, you can experiment with different types of meat such as pancetta or turkey bacon for a lighter option.
What should I do if my bacon isn’t crisping up?
Ensure your oven is preheated properly and check if the bundles are crowded on the baking sheet. Space them out for better airflow.
What can I add for a little kick of heat?
For a spicy twist, sprinkle some red pepper flakes or use a spicy bacon variant to give your bundles a little kick.
Can I prepare the bundles ahead of time?
You can prepare the bundles and refrigerate them for a few hours before roasting. Ensure they are tightly wrapped to maintain freshness.
What happens if I overcook the bundles?
Overcooking can lead to mushy green beans and overly crispy bacon. Monitor the bundles closely towards the end of the cooking time.
Conclusion
Incorporating green bean bundles into your cooking repertoire can transform your vegetable offerings into something remarkable. Their combination of flavors and textures offers a delightful experience that’s truly satisfying.
Whether you’re hosting a festive celebration or enjoying a quiet dinner at home, these bundles are sure to be a hit. With their easy preparation and stunning presentation, you'll want to make them again and again.
Recipe Card

Decadent Double Chocolate Cookies from In Bloom Bakery
Ingredients
- 1 cup all-purpose flour
- 1/2 cup unsweetened cocoa powder
- 1/2 teaspoon baking soda
- 1/4 teaspoon salt
- 1/2 cup unsalted butter softened
- 1/2 cup granulated sugar
- 1/4 cup brown sugar
- 1 teaspoon vanilla extract
- 1 large egg
- 3/4 cup semi-sweet chocolate chips
Instructions
- Preheat the oven to 350°F (175°C).
- In a bowl, whisk together the flour, cocoa powder, baking soda, and salt.
- In a separate bowl, cream the softened butter, granulated sugar, and brown sugar until light and fluffy.
- Add the egg and vanilla extract to the butter mixture, beating until combined.
- Gradually add the dry ingredients to the wet mixture, mixing just until combined.
- Fold in the semi-sweet chocolate chips.
- Scoop tablespoon-sized balls of dough onto a baking sheet lined with parchment paper.
- Bake for 10-12 minutes until the edges are firm but the centers are still soft.
- Let the cookies cool on the baking sheet for 5 minutes before transferring them to a wire rack.
Notes
Additional serving suggestions: pair with a crisp salad, garlic bread, or roasted seasonal vegetables for balance.
For make-ahead, prep components separately and assemble just before heating to preserve texture.
Taste and adjust with acid (lemon/vinegar) and salt right at the end to wake up flavors.


