Introduction
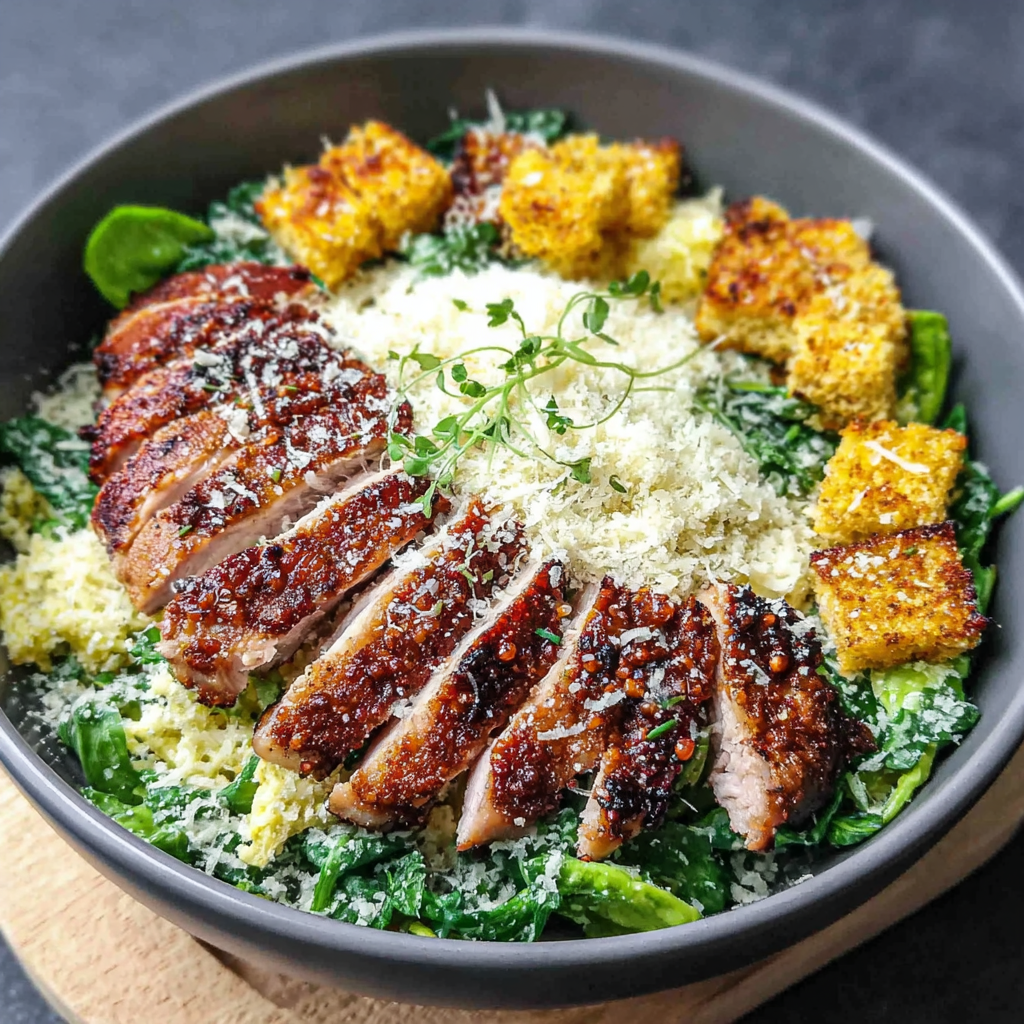
What could be more satisfying than a well-crafted bowl that features the classic flavors of Caesar salad paired with juicy chicken? The Caesar-Hähnchen-Bowl brings together crunchy romaine, perfectly grilled chicken, and a creamy dressing in a thoughtful assembly that delights the senses.
This recipe is not just a meal; it’s a wholesome experience that you can easily recreate at home. Whether you are serving it for a weeknight dinner or a weekend gathering, its blend of textures and flavors is sure to impress your family and friends alike.
With a focus on fresh ingredients and simple techniques, this bowl brings the restaurant experience right into your kitchen. Get ready to elevate your meal planning by adding this vibrant dish to your repertoire.
Ingredients
- 2 chicken breasts (about 500g)
The star of the bowl, chicken breasts provide lean protein that keeps the dish satisfying and fulfilling. Grilling or baking them enhances their natural flavors and ensures they remain juicy. - 1 cup romaine lettuce, chopped
Romaine lettuce contributes a refreshing, crisp texture that contrasts beautifully with the heartiness of the chicken. Its slightly bitter flavor is balanced nicely by the richness of the dressing. - 1/2 cup Caesar dressing
Caesar dressing adds creaminess and a zesty kick to the bowl. A homemade version allows you to control flavors, while a store-bought variety saves time without sacrificing taste. - 1/4 cup grated Parmesan cheese
Parmesan cheese not only enhances the flavor profile with its nutty notes but also adds a touch of elegance to the dish. It melts slightly onto the warm chicken for a delicious finish. - 1/3 cup croutons
Croutons provide the necessary crunch that contrasts with the juicy chicken and creamy dressing, making the bowl more dynamic. Feel free to use store-bought or homemade varieties. - 1 tablespoon olive oil
Olive oil is essential for brushing the chicken before cooking to ensure a flavorful crust forms during grilling or baking. It also enhances the overall richness of the dish. - Salt and pepper, to taste
Basic seasoning like salt and pepper is crucial for bringing out the natural flavors of the chicken and salad ingredients. Adjust it according to your taste preferences to enhance the final dish.
Directions & Preparation
Step 1: Preheat the grill or oven to medium-high heat.
Starting with a preheated grill or oven ensures that the chicken cooks evenly and achieves a desirable char or golden color. This step is crucial for locking in moisture and flavor, leading to perfectly cooked chicken.
Step 2: Season the chicken breasts with olive oil, salt, and pepper.
By brushing the chicken with olive oil, you not only add flavor but also help prevent sticking during cooking. A sprinkle of salt and pepper enhances the natural taste of the chicken, preparing it for the coming heat.
Step 3: Grill or bake the chicken for 6-8 minutes on each side, until fully cooked.
Cooking time may vary based on the thickness of the chicken breasts and the heat of your grill or oven. To ensure safety, check for an internal temperature of 75°C (165°F) to confirm they are fully cooked and safe to eat.
Step 4: Let the chicken rest for a few minutes before slicing.
Resting allows the juices to redistribute throughout the chicken, which prevents them from spilling out when cut. This small step boosts moisture content, making each slice tender and juicy.
Step 5: Prepare the bowl by layering chopped romaine at the bottom.
Starting with a bed of romaine not only adds volume to your bowl but also creates a fresh, crunchy base that balances the heavier elements of the dish. The lettuce’s crispness makes each bite satisfying.
Step 6: Slice the rested chicken and arrange it on top of the romaine.
Slicing chicken after it rests ensures neat pieces that are easy to eat. Arrange them artistically over the romaine, allowing the vibrant colors to catch the eye and encourage a beautiful presentation.
Step 7: Drizzle with Caesar dressing and sprinkle Parmesan cheese on top.
The dressing brings creaminess, while Parmesan adds a savory depth to the dish. Drizzling rather than pouring ensures an even distribution of dressing without overwhelming the fresh ingredients.
Step 8: Finish with croutons for added crunch.
Croutons provide that necessary texture contrast, adding an enjoyable crunch to every bite. They also soak up a bit of the dressing, making them even more flavorful and deliciously integrated into the bowl.

Elevate Your Caesar Dressing
Consider making a homemade Caesar dressing for a fresher taste that complements the chicken beautifully. Adding elements like garlic, fresh lemon juice, and anchovies creates a flavor dynamism that outshines store-bought options. Adjust the tanginess to suit your palate, and explore variations like substituting Greek yogurt for a lighter version.
Customizable Protein Options
While chicken is the quintessential protein for this bowl, feel free to experiment with other options. Grilled shrimp, tofu, or even chickpeas can deliver delightful flavors and textures, allowing the Caesar-Hähnchen-Bowl to adapt to your dietary preferences. Each protein adds its unique element, encouraging creativity in your cooking.
Seasonal Toppings for Extra Flavor
Add seasonal vegetables or toppings to further enhance your Caesar-Hähnchen-Bowl. Grilled corn, cherry tomatoes, or asparagus lend vibrancy and nutritional value. This versatility enables the recipe to be adjusted with seasonal produce, transforming it into a year-round favorite that's fresh and exciting with new ingredients.
FAQs
Can I use rotisserie chicken for convenience?
Absolutely! Using rotisserie chicken is a great shortcut that saves time while still ensuring flavor. Just heat it up and slice before adding to your bowl.
What should I do if my chicken overcooks and becomes dry?
To revive dry chicken, try adding a bit of extra Caesar dressing or a drizzle of olive oil over the sliced chicken before serving. This can help add moisture back into it.
How can I adjust the flavors of the Caesar dressing?
You can enhance your Caesar dressing by incorporating additional garlic, lemon juice, or even capers for a tangy kick. Adjust according to your personal preferences for a perfect blend.
What kind of croutons work best for this bowl?
Opt for croutons that are well-seasoned and sturdy enough to hold up to the dressing without becoming soggy. Homemade versions allow you to tailor the flavors to your liking.
Can I replace the Parmesan with another cheese?
Yes, you can use Pecorino Romano for a sharper flavor or nutritional yeast for a dairy-free alternative. Both can offer a unique twist to the bowl.
How can I make the dish more filling?
To add extra substance, consider incorporating grains like quinoa or farro into the bottom layer of the bowl. These will add both texture and a nutritional boost.
Conclusion
The Caesar-Hähnchen-Bowl is a delightful fusion of comforting and refreshing components, making it a beloved addition to any dining table. Its simplicity in preparation combined with robust flavors creates a fulfilling meal perfect for any occasion.
Whether you’re enjoying it as a light lunch or a dinner dish, this recipe allows for plenty of creativity with toppings and proteins. Elevate your usual meal rotation by incorporating this delicious bowl today!
Recipe Card

Moist Chocolate Pumpkin Muffins for Fall Delights
Ingredients
- 1 cup pumpkin puree
- 1 cup all-purpose flour
- 1/2 cup unsweetened cocoa powder
- 1 cup sugar
- 1/2 cup vegetable oil
- 2 large eggs
- 1 teaspoon vanilla extract
- 1 teaspoon baking soda
- 1 teaspoon baking powder
- 1/2 teaspoon salt
- 1/2 cup chocolate chips optional
Instructions
- Preheat your oven to 350°F (175°C) and line a muffin tin with paper liners or grease it lightly.
- In a large bowl, whisk together the pumpkin puree, vegetable oil, eggs, and vanilla until well combined.
- In a separate bowl, mix the dry ingredients: flour, cocoa powder, sugar, baking soda, baking powder, and salt.
- Gradually add the dry mixture to the wet ingredients, stirring until just combined. Avoid over-mixing.
- If desired, fold in chocolate chips for extra richness and flavor.
- Spoon the batter into the prepared muffin tin, filling each cup about two-thirds full.
- Bake in the preheated oven for 18-22 minutes, or until a toothpick inserted into the center comes out clean.
- Let the muffins cool in the pan for 5-10 minutes before transferring them to a wire rack to cool completely.
Notes
Additional serving suggestions: pair with a crisp salad, garlic bread, or roasted seasonal vegetables for balance.
For make-ahead, prep components separately and assemble just before heating to preserve texture.
Taste and adjust with acid (lemon/vinegar) and salt right at the end to wake up flavors.


