Introduction
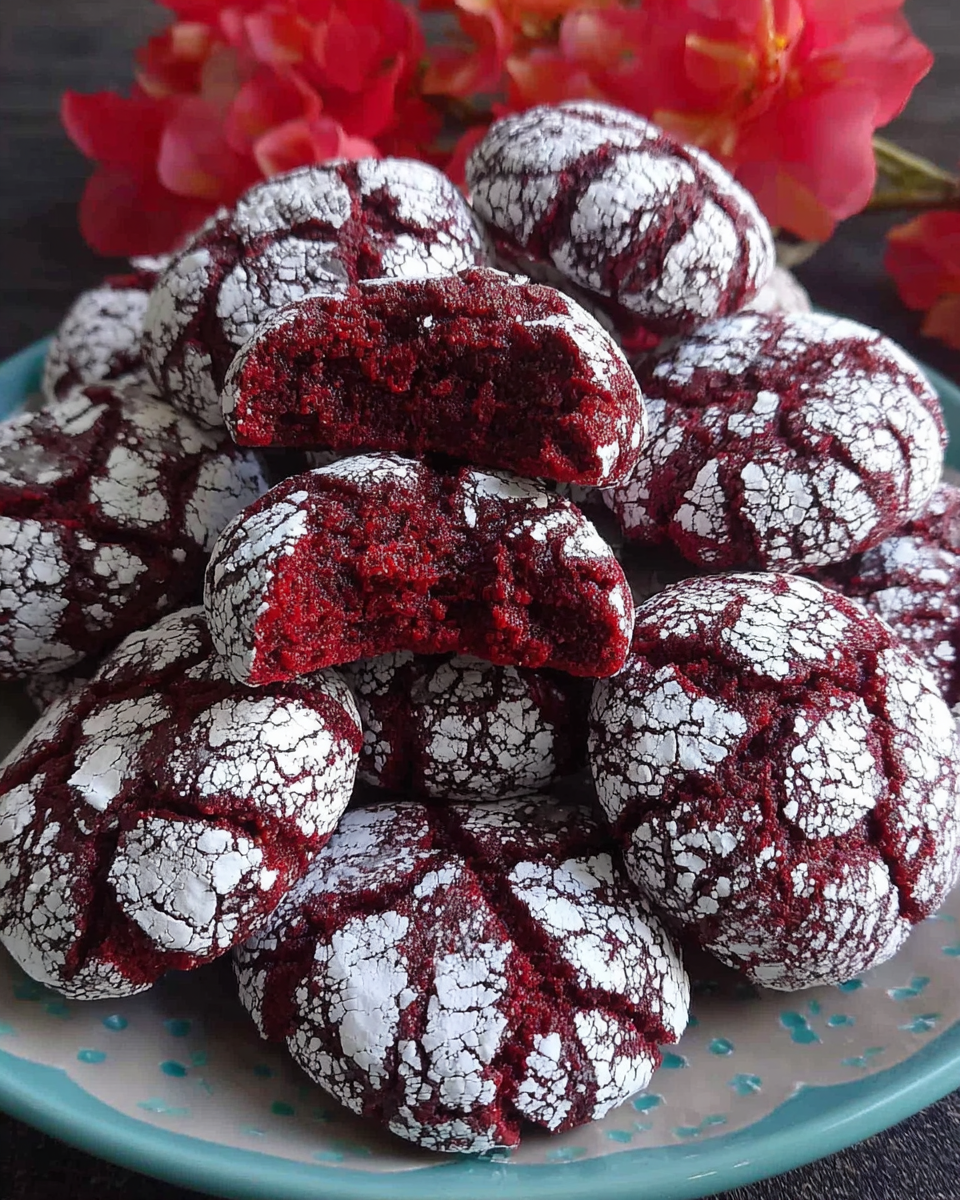
Red velvet crinkle cookies are a delightful twist on the classic dessert that bring a festive touch to any occasion. Their vibrant red color and signature white powdered sugar coating make them a visual treat that is sure to impress.
Not only do these cookies look stunning, but their flavor is equally captivating. They combine the rich taste of cocoa with a hint of buttermilk tang, resulting in a fudgy texture that melts in your mouth. Perfect for holiday gatherings or cozy nights at home.
Ingredients
- 2 cups all-purpose flour
All-purpose flour provides the structure for the cookies. It helps create a chewy exterior while allowing for a soft and fudgy interior. - 1/2 cup cocoa powder
Cocoa powder adds depth and richness to the flavor of the cookies. It contributes to the signature chocolatey taste that complements the red velvet theme. - 1 teaspoon baking powder
Baking powder is a leavening agent that helps the cookies rise as they bake, creating a light and airy texture. - 1/2 teaspoon baking soda
Baking soda reacts with the acidic ingredients in the dough, contributing to the cookies' rise and texture while enhancing flavor. - 1/2 teaspoon salt
Salt enhances the overall flavor of the cookies and balances the sweetness, ensuring a well-rounded and delicious bite. - 1/2 cup unsalted butter, softened
Butter provides richness and moisture to the cookies. It also contributes to the dough's texture and flavor, resulting in a tender cookie. - 1 cup granulated sugar
Sugar adds sweetness and helps the cookies achieve a soft and chewy consistency. It also gives the cookie its beautiful golden edges. - 1 large egg
The egg binds the ingredients together and helps provide structure, while also contributing to the tenderness of the cookies. - 1 teaspoon vanilla extract
Vanilla extract enhances the overall flavor of the cookies, adding a warm, comforting note that complements all the other ingredients. - 1 tablespoon red food coloring
Red food coloring gives the cookies their characteristic vibrant hue, making them stand out and adding to their festive appeal. - 1/2 cup powdered sugar (for coating)
Powdered sugar provides a sweet coating that not only adds to the aesthetic of the cookies but also creates a delightful contrast with the rich flavor.
Directions & Preparation
Step 1: Preheat your oven to 350°F (175°C).
Preheating the oven is essential to ensure even baking. By starting with a hot oven, the cookies will rise properly, creating a soft center and a slightly crisp outer layer.
Step 2: In a bowl, whisk together the flour, cocoa powder, baking powder, baking soda, and salt.
Whisking these dry ingredients together ensures that they are evenly distributed, preventing clumps and ensuring a uniform texture in the cookies. This step is vital for consistent flavor and rise.
Step 3: In a separate bowl, cream the butter and sugar until light and fluffy.
Creaming butter and sugar together incorporates air into the mixture, which helps create a light texture in the cookies. It also evenly combines the sugar, ensuring a sweet taste in every bite.
Step 4: Add the egg, vanilla extract, and red food coloring to the butter mixture, and mix until combined.
Incorporating the egg and other wet ingredients at this stage adds moisture and binds the mixture, making it easier to work with. Red food coloring is crucial for achieving the striking color of red velvet.
Step 5: Gradually mix in the dry ingredients until just combined.
Mixing in the dry ingredients gradually helps prevent overmixing, which can lead to tough cookies. The goal is to incorporate the ingredients without losing the airiness achieved during creaming.
Step 6: Refrigerate the dough for at least 30 minutes.
Chilling the dough solidifies the butter, which helps prevent the cookies from spreading too much during baking. This results in thick, soft cookies that hold their form nicely.
Step 7: Scoop out tablespoon-sized amounts of dough and roll them into balls.
Rolling the dough into balls helps ensure even baking and a nice appearance. It also makes it easy to coat them in powdered sugar, creating that signature crinkle effect.
Step 8: Roll each dough ball in powdered sugar to coat them thoroughly.
Coating the dough balls in powdered sugar not only enhances the cookies' visual appeal, but it also contributes to the delightful texture, creating a crisp outer layer.
Step 9: Place the cookies on a parchment-lined baking sheet and bake for 12-15 minutes.
Baking the cookies at the right temperature and time is crucial for achieving the perfect texture. They should be set around the edges but still soft in the center for that fudgy finish.
Step 10: Allow the cookies to cool on the baking sheet for 5 minutes before transferring them to a wire rack.
Cooling the cookies slightly on the baking sheet allows them to firm up without losing their soft, fudgy interior. Transferring them to a wire rack helps them cool evenly, maintaining their texture.

Secret to the Perfect Crinkle Effect
The crinkle effect of these cookies comes from the powdered sugar coating and the leavening agents in the dough. As the cookies bake, the baking powder creates rising bubbles, causing the surface to crack and expose the contrasting red color beneath. It’s a visual and textural delight that elevates these cookies from standard to spectacular.
Pairing Flavors that Shine
Red velvet cookies have a rich chocolate flavor, making them perfect for pairing with various complementary ingredients. Consider serving them with a cream cheese frosting dip or enjoy them alongside a glass of cold milk. The combination enhances the fudgy experience and adds a delightful creaminess that balances the flavors beautifully.
Enhancing the Festive Touch
To elevate these cookies for special occasions, consider adding festive sprinkles or drizzling with melted white chocolate after baking. This not only enhances the visual appeal but also adds an extra layer of flavor that pairs perfectly with the chocolatey cookies. These small touches can make your red velvet crinkle cookies a showstopper at any gathering.
FAQs
What if my dough is too sticky?
If the dough is too sticky to work with, you can refrigerate it for an additional 10-15 minutes. This will help solidify the butter, making it easier to roll the dough into balls.
Can I use a different type of food coloring?
Yes, you can use gel food coloring for a more vibrant hue or even natural alternatives, though the color may vary. Just ensure the consistency remains similar to achieve the desired visual effect.
What if my cookies turn out too dry?
If your cookies are dry, it may be due to overbaking or too much flour. Keep an eye on them while baking, and use the spoon-and-level method for measuring flour to avoid excess.
Can I substitute extra cocoa powder for flour?
Substituting cocoa powder for flour may result in a denser cookie with a more intense chocolate flavor. If you want to maintain the texture, it's better to stick to the original ratios.
Why did my cookies not crinkle as expected?
If the cookies did not crinkle, it could be a sign that they were not chilled enough before baking, or that they were overmixed. Ensure proper chilling and mix just until combined for the best results.
What can I do if the powdered sugar doesn't stick?
If the powdered sugar is not sticking, ensure the cookie dough balls are moist enough. You can lightly re-roll them or add a tiny amount of melted butter to help the sugar adhere.
Conclusion
Red velvet crinkle cookies are more than just a treat; they're a delightful blend of flavors and textures that make every bite a celebration. With their striking appearance, they are sure to become a favorite for both the baker and those lucky enough to taste them.
Whether enjoyed during the holidays or simply as a special treat, these cookies are a lovely way to add a pop of color and flavor to your dessert repertoire. Embrace the joy of baking with these festive delights, and watch them disappear almost as quickly as you can make them.
Recipe Card

Indulgent Cheesy Garlic Scalloped Potatoes Recipe
Ingredients
- 4 large russet potatoes sliced
- 2 cups heavy cream
- 1 cup shredded sharp cheddar cheese
- 4 cloves of garlic minced
- 1 teaspoon salt
- 1/2 teaspoon black pepper
- 1 tablespoon fresh parsley chopped (optional garnish)
Instructions
- Preheat the oven to 375°F (190°C).
- Prepare the potatoes by washing, peeling, and slicing them thinly.
- In a saucepan, combine heavy cream, minced garlic, salt, and black pepper. Heat gently until just warmed.
- Layer half of the sliced potatoes in a greased baking dish. Pour half of the cream mixture over the potatoes, and sprinkle half of the cheese on top.
- Repeat with the remaining potatoes, cream, and cheese to create a second layer.
- Cover the baking dish with aluminum foil and bake for 45 minutes.
- Remove the foil and bake for an additional 30 minutes, or until the top is golden and bubbly.
- Let the dish cool for 10 minutes before serving, and garnish with fresh parsley if desired.
Notes
Additional serving suggestions: pair with a crisp salad, garlic bread, or roasted seasonal vegetables for balance.
For make-ahead, prep components separately and assemble just before heating to preserve texture.
Taste and adjust with acid (lemon/vinegar) and salt right at the end to wake up flavors.


