Introduction
If you're looking for a dish that combines the comforting qualities of potatoes with the irresistible allure of melted cheese, you've arrived at the right recipe. Crispy Cheesy Potatoes Stacks are not just a side; they can steal the spotlight on your dinner table.
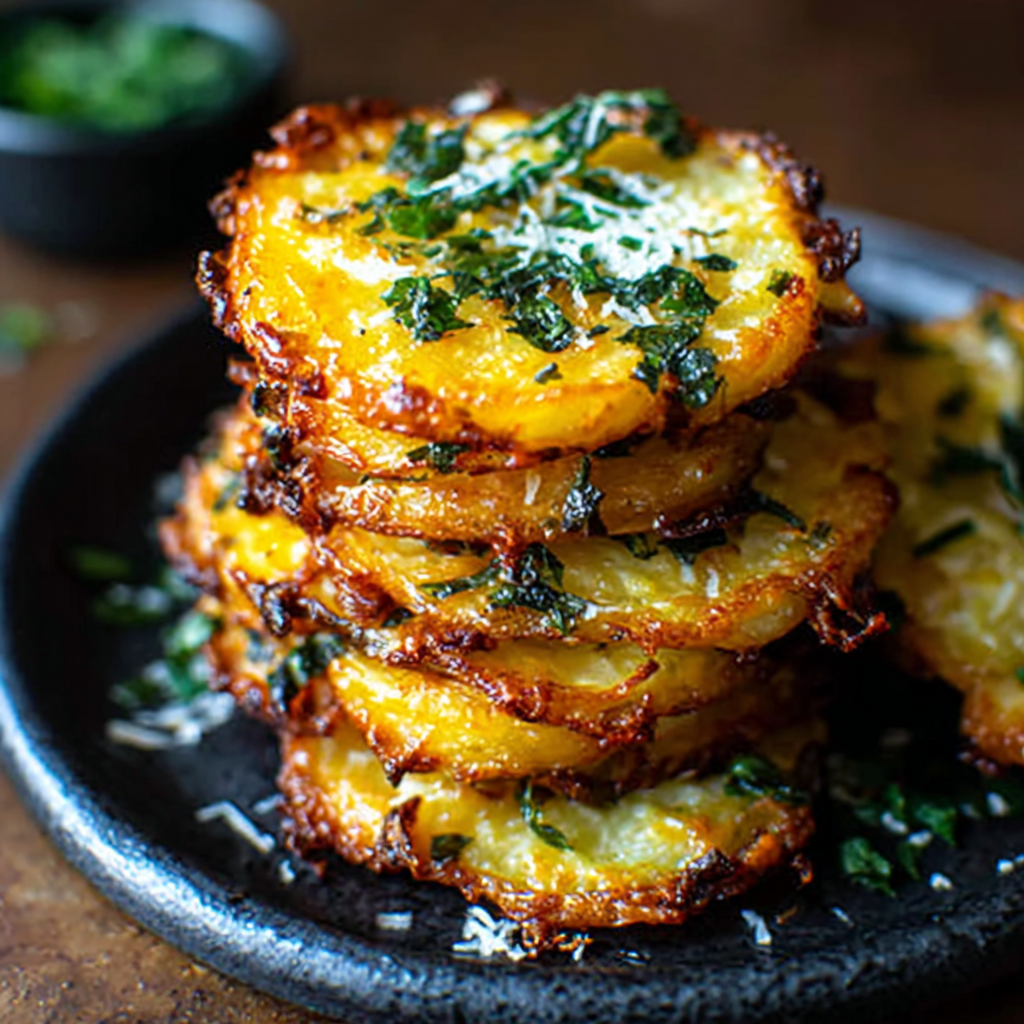
Layered, crispy, and infused with flavors, these potato stacks are deliciously satisfying. Perfectly baked until golden brown, they feature a delightful crunch on the outside while remaining creamy and savory inside. Let's dive into this recipe that is as pleasing to the palate as it is to the eye.
Ingredients
- 4 large russet potatoes, peeled and thinly sliced
Russet potatoes are ideal for this recipe as they have a high starch content, which helps achieve that desired crispy texture. Their sturdy structure holds up well during the baking process. - 1 cup shredded sharp cheddar cheese
Sharp cheddar cheese adds a robust flavor that enhances the overall taste of the stacks. It melts beautifully, providing that gooey texture that complements the crispy potatoes. - 1/2 cup grated Parmesan cheese
Parmesan infuses a salty, nutty flavor that rounds out the cheesy note. Its texture helps in creating a crust-like coating on the outside of the potato stacks. - 1/4 cup unsalted butter, melted
Butter not only adds richness but also serves to help crisp the edges of the potatoes as they bake. It helps in browning and deepening the flavor profile. - 2 teaspoons garlic powder
Garlic powder delivers an aromatic warmth without overpowering the other flavors. It seeps into the potatoes, enhancing their savory quality. - Salt and pepper to taste
Seasoning with salt and pepper is crucial, as it elevates the natural flavors of the potatoes. Adjust according to your preference for perfectly balanced stacks.
Directions & Preparation
Step 1: Preheat the oven to 425°F (220°C).
Preheating the oven ensures that the environment is hot enough to start cooking the potatoes immediately, which promotes thorough cooking and crispiness from the start.
Step 2: Thinly slice the peeled russet potatoes using a mandoline or sharp knife.
Uniform slices ensure even cooking and consistent texture across the potato stacks. Aim for about 1/8 inch thickness; this allows for maximum crispiness without compromising the moisture of the potato.
Step 3: In a mixing bowl, combine melted butter, garlic powder, salt, and pepper.
Mixing these ingredients together means that every slice will have the same flavor profile. This step is vital to ensure that the seasoning is evenly distributed throughout the dish.
Step 4: Toss the potato slices in the butter mixture until well-coated.
Coating the potato slices in this mixture provides that rich flavor and helps them crisp up while baking. Ensuring that they are well-coated is key to maximizing flavor.
Step 5: Grease a muffin tin with non-stick spray or additional butter.
A well-greased muffin tin prevents sticking and allows for easy removal of the potato stacks. This step is essential for preserving the crispy exterior once they’re baked.
Step 6: Layer the potato slices into the muffin tin, stacking them vertically in each cup.
Layering the slices like a tower promotes even cooking, creating contrasting textures of crispy edges and tender insides. Be sure to pack them slightly to encourage that delightful crunch.
Step 7: Sprinkle a layer of sharp cheddar and Parmesan cheese between the potato layers.
Adding cheese between the layers as you stack promotes even melting and creates that delicious cheesy pull when you bite into the stacks. The layers of cheese also contribute to the overall flavor.
Step 8: Repeat layering until the muffin cups are filled to the top.
Filling them to the top allows for a more fulfilling dish with every bite. Adjust the amount of cheese based on your preference; a gooier stack can be gratifying.
Step 9: Bake in the oven for 35-40 minutes or until golden brown and crispy.
Baking at this temperature is crucial for achieving that perfect crispiness on the outside while ensuring that the insides become soft and tender. Keeping an eye on them near the end of baking will help prevent burning.
Step 10: Allow to cool slightly before removing from the muffin tin.
Letting them cool for a few minutes ensures they hold their shape and allows the crispy edges to set. This step is key to enjoying stacks that won’t fall apart upon serving.
Step 11: Serve warm, garnished with additional cheese or herbs if desired.
Serving warm enhances the flavors and ensures that the cheese remains gooey on the inside. Garnishes like herbs add freshness and visual appeal, elevating the final presentation.

Why Layering Matters in Crispy Cheesy Potatoes
Layering the potato slices thoughtfully is vital for creating those sought-after crispy edges and soft interiors. Each slice interacts with the cheese and butter, allowing for a perfect blend of textures. When baked, the layers contribute to an impressive, tower-like stack that looks stunning and tastes heavenly.
Exploring Cheese Choices for Flavor Variety
While sharp cheddar and Parmesan are delightful, feel free to explore other cheeses. Gouda offers a creamy texture, while mozzarella delivers gooeyness. Combining different varieties can create unique flavor profiles, allowing your potato stacks to evolve with each new iteration. The right cheese can redefine your experience.
Potential Modifications for Personal Taste
Don’t hesitate to modify your potato stacks by adding ingredients such as crisp bacon, sautéed onions, or herbs like rosemary for a fresh twist. Integrating vegetables can enhance both flavor and nutrition, making this dish your own while still maintaining that delightful crispy texture.
FAQs
What if my potato stacks are too greasy after baking?
If the stacks are too greasy, consider reducing the amount of butter in the mixture for the next time. You could use a lighter oil or even less butter to coat the potatoes.
Can I use pre-shredded cheese for this recipe?
Yes, pre-shredded cheese works well for convenience, but it may contain anti-caking agents that could affect melting. Freshly shredded cheese usually melts better.
What if my potato slices are uneven in thickness?
Uneven slices can lead to inconsistent cooking, so it’s best to aim for uniform thickness. If they’re uneven, you may need to adjust the baking time based on the thickness.
Can I experiment with flavored butter?
Absolutely! Using flavored butter, such as garlic or herb-infused, can elevate the dish with additional layers of flavor.
What should I do if my stacks don’t crisp up during baking?
If the stacks aren’t crispy enough, try extending the baking time by a few minutes or increase the oven temperature slightly. Just keep an eye on them to avoid burning.
How can I adjust the recipe for a larger crowd?
To make larger batches, simply multiply the ingredient quantities, and consider using multiple muffin tins or a larger baking dish to accommodate the additional slices.
Conclusion
Crispy Cheesy Potatoes Stacks are not only a feast for the eyes but also a comforting delight for the taste buds. With each bite, you’ll experience layers of flavor and texture that are sure to impress family and friends alike.
So gather your ingredients, commit to following these steps, and get ready to enjoy a dish that will become a staple in your home. Whether it’s a festive occasion or just a cozy dinner, these stacks will surely win hearts.
Recipe Card

Comforting Fall Dinner Ideas for Cozy Nights
Ingredients
- butternut squash 1 medium
- chicken thighs 4 pieces
- onion 1 large, diced
- garlic 4 cloves, minced
- vegetable broth 4 cups
- sage 1 tablespoon, chopped
- heavy cream 1 cup
- grated Parmesan cheese 1/2 cup
- spinach 3 cups, fresh
- cinnamon 1/2 teaspoon
Instructions
- Preheat your oven to 400°F (200°C).
- Peel and cube the butternut squash into 1-inch pieces.
- In a large skillet, heat oil over medium heat and sauté the diced onion until translucent.
- Add minced garlic and chopped sage to the skillet, cooking for an additional minute.
- Toss in the cubed butternut squash and sauté for 5-7 minutes.
- Transfer the mixture to a baking dish and nestle the chicken thighs among the vegetables.
- Pour vegetable broth over the ingredients and sprinkle with salt and pepper to taste.
- Cover with foil and bake for 35 minutes, then remove the foil and bake for an additional 15-20 minutes.
- During the last 10 minutes, stir in fresh spinach and heavy cream, topping with Parmesan cheese.
- Serve hot, garnished with extra sage if desired.
Notes
Additional serving suggestions: pair with a crisp salad, garlic bread, or roasted seasonal vegetables for balance.
For make-ahead, prep components separately and assemble just before heating to preserve texture.
Taste and adjust with acid (lemon/vinegar) and salt right at the end to wake up flavors.


