Introduction
As the holiday season approaches, there's an undeniable excitement that permeates the air. One of the joys of this time of year is indulging in sweet treats that encapsulate the spirit of celebration, and nothing does this better than Candy Cane Brownie Bombs. These delightful bites combine the richness of chocolate brownies with the refreshing twist of peppermint, making them the perfect festive snack for gatherings and gift-giving.
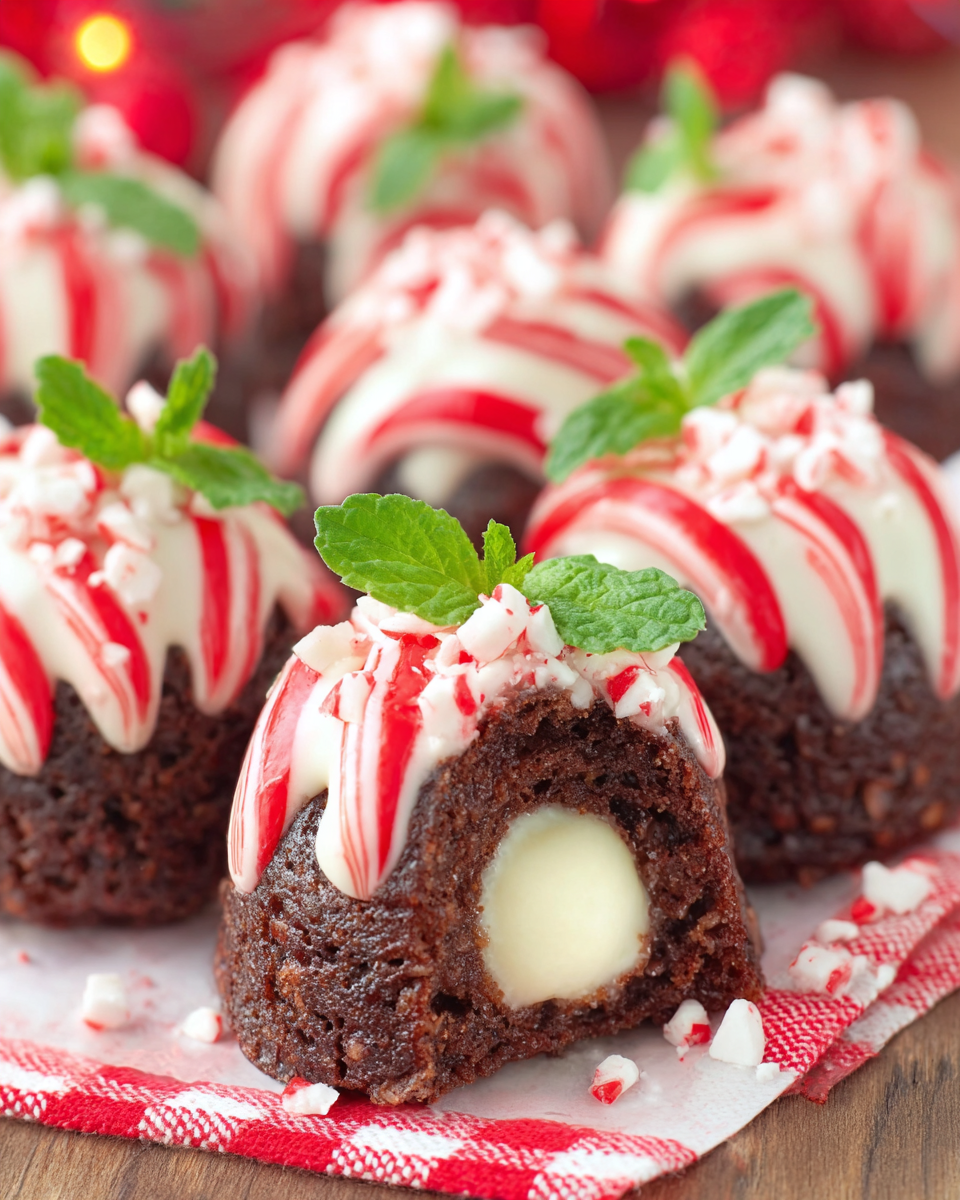
Each bite of these brownie bombs envelops you in a burst of flavor, playfully mingling the sweetness of chocolate with the festive crunch of candy canes. Imagine serving these at holiday parties, where the vibrant red and white specks create a visual treat as delightful as their taste. Whether you’re a seasoned baker or a kitchen novice, making Candy Cane Brownie Bombs is an enjoyable process that will yield impressive results.
Ingredients
- 1 cup unsalted butter, melted
Butter plays a key role in brownie recipes, providing moisture and richness. The melting process helps combine ingredients smoothly, yielding a fudgy texture that's hard to resist. - 2 cups granulated sugar
Sugar not only adds sweetness but also contributes to the brownie's structure. The sugar dissolves during baking, helping to create a shiny, crinkled top that is characteristic of delicious brownies. - 1 cup packed brown sugar
Brown sugar contains molasses, which imparts moisture and a subtle caramel flavor. This enhances the depth of taste in the brownies, making them taste rich and indulgent. - 4 large eggs
Eggs are crucial for binding ingredients together and provide structure. They also add moisture, creating a tender and chewy brownie. - 1 teaspoon vanilla extract
Vanilla enhances the overall flavor profile of your brownies, integrating the sweetness and chocolate richness harmoniously, elevating the treat beyond just a simple dessert. - 1 cup all-purpose flour
Flour is essential for structure; it binds the ingredients and helps the brownies rise slightly. The amount used will impact the texture, so measuring accurately is crucial. - 3/4 cup unsweetened cocoa powder
Cocoa powder is the star player for chocolate flavor in brownies. It provides richness and depth, ensuring that each bite is decadently chocolaty. The unsweetened variant keeps the sugar levels balanced. - 1 teaspoon baking powder
Baking powder is a leavening agent that helps the brownies puff slightly during baking. This contributes to their chewy texture rather than being dense and heavy. - 1/2 teaspoon salt
Salt is critical in any dessert; it enhances all the flavors, cutting through sweetness and bringing depth to the chocolate. Without salt, the brownies might taste flat. - 1 cup crushed candy canes
Crushed candy canes provide a festive crunch and minty freshness that elevates these brownies. They serve both as a flavor enhancer and a decorative element. - 1 cup semi-sweet chocolate chips
Chocolate chips add melty pockets of chocolate within the brownies, enhancing the richness. They also provide bursts of flavor with each bite, immersing your taste buds in chocolate bliss. - 2 cups white chocolate for coating
Melting and coating the brownies in white chocolate adds a creamy sweetness that balances the rich chocolate base. It also acts as a blank canvas for holiday toppings, creating visual appeal. - Extra crushed candy canes for garnish
Using additional crushed candy canes as a garnish not only adds to the visual presentation but enhances the peppermint flavor, making each bite even more tantalizing.
Directions & Preparation
Step 1: Preheat your oven to 350°F (175°C) and prepare a baking pan.
Preheating the oven is an essential step in baking to ensure even cooking. Make sure to prepare your pan by greasing it or lining it with parchment paper to prevent the brownies from sticking and to aid in easy removal once baked.
Step 2: In a large mixing bowl, combine melted butter, granulated sugar, brown sugar, eggs, and vanilla extract.
Mixing the wet ingredients first allows sugar to dissolve properly, ensuring a smoother brownie texture. Whisking these ingredients together at this stage helps to incorporate air, which will contribute to a nice texture in the final product.
Step 3: In another bowl, whisk together flour, cocoa powder, baking powder, and salt.
Separating the dry ingredients ensures they are evenly distributed before being combined with the wet mix. This minimizes the risk of pockets of flour or cocoa powder in your batter, leading to uniformly flavored brownies.
Step 4: Slowly add the dry ingredients to the wet mixture, stirring until just combined.
Overmixing can create tough brownies, so mix just until the dry ingredients are incorporated. This will lead to fewer gluten formations, yielding a more tender texture. You might still see some flour streaks, which is okay.
Step 5: Fold in crushed candy canes and chocolate chips.
Folding the candy canes and chocolate chips into the batter ensures they are evenly distributed without deflating the batter. The candy canes will add a surprising crunch, and the chocolate chips melting during baking will provide rich chocolate pockets.
Step 6: Pour the batter into the prepared pan and spread it evenly.
Spreading the batter evenly ensures uniform baking and helps avoid a situation where the edges cook faster than the center. An offset spatula can be helpful in creating a smooth surface.
Step 7: Bake for 25-30 minutes, checking for doneness.
Baking for the right amount of time is crucial; you want the edges set while the center remains a bit soft. Use a toothpick to check: it should come out with a few moist crumbs, indicating perfect fudge-like brownies.
Step 8: Allow brownies to cool completely in the pan before slicing.
Cooling allows the brownies to set up, making slicing easier and preventing them from falling apart. This step is often overlooked but is vital for achieving that perfect brownie texture.
Step 9: Melt white chocolate in a microwave-safe bowl until smooth.
Gently melting white chocolate is necessary for coating; it should be glossy without any lumps. Stirring every 30 seconds prevents scorching and helps achieve the right consistency for dipping.
Step 10: Dip each brownie square in the melted white chocolate, then sprinkle with crushed candy canes.
Dipping the brownies allows them to be coated evenly, and the crushed candy canes provide a beautiful festive touch. This is not only about taste but also enhances visual appeal, making them a treat for the eyes as well.
Step 11: Set the coated brownies on a wire rack to allow the coating to harden.
Allowing the chocolate coating to setup ensures that the brownies maintain their delicious exterior and won’t smudge or lose their shape. Placing them on a wire rack offers air circulation for even cooling.

The Perfect Blend of Fudgy and Crunchy
The texture of Candy Cane Brownie Bombs is one of their defining features. While the brownie base provides a soft, fudgy center, the crushed candy canes offer an inviting crunch. This contrast makes every bite exciting, keeping your taste buds engaged and elevating the overall dessert experience. Pairing these textures can turn a simple brownie into an extraordinary treat.
A Holiday Tradition in the Making
Creating Candy Cane Brownie Bombs can quickly become a cherished holiday tradition for you and your loved ones. The simplicity of the recipe allows for family involvement, whether in mixing, dipping, or decorating. Make it a fun event by inviting friends or family over to bake and create together, transforming a simple task into lasting memories and bonding moments.
Versatile Treats for Any Occasion
While Candy Cane Brownie Bombs are perfect for the holiday season, their appeal transcends into other occasions. Consider them for parties, gifts, or even as a sweet treat during movie nights. By changing up the candy toppings or adding different flavors of chocolate, you can adapt this recipe to suit any taste preference or event theme, allowing for endless creativity.
FAQs
What if the brownie batter seems too thick?
If the brownie batter appears excessively thick, try adding a tablespoon of milk at a time until you achieve the desired consistency. Be cautious not to over-mix, as this can affect the final texture.
Can I use dark chocolate chips instead of semi-sweet?
Yes, swapping in dark chocolate chips will enrich the chocolate flavor and offer a slightly different taste profile. Just be aware that they may make the brownies richer.
What if my brownies turn out too dry or crumbly?
If your brownies are overbaked or too dry, they can become crumbly. Make sure to monitor the baking time carefully and remove them from the oven as soon as a toothpick reveals a few moist crumbs. You can also add a bit of frosting or a chocolate drizzle after baking to add moisture.
Can I personalize the toppings of my Candy Cane Brownie Bombs?
Absolutely! Feel free to substitute crushed peppermint for other toppings like chopped nuts, dried fruits, or even sprinkles to customize your brownie bombs to your preference.
How can I make these brownie bombs festive for a party?
To enhance the festive appearance, consider using colored sprinkles or edible glitter in addition to crushed candy canes for decoration. Creating a holiday-themed presentation elevates them for any festive gathering.
What if I want to make these brownie bombs smaller or larger?
To adjust the size, simply cut the brownies into your desired dimensions after they cool. Smaller bites could be called brownie bite bombs, while larger portions can serve as a decadent dessert centerpiece.
Conclusion
Candy Cane Brownie Bombs exemplify the joy of the holiday season through their festive colors and delightful flavors. With a combination of rich chocolate and refreshing peppermint, these treats are sure to be a hit at any gathering.
Whether enjoyed at a holiday party or shared as gifts, these little bombs of joy will spread cheer and sweetness. Embrace the festivities and bring a smile to your loved ones with this sumptuous treat.
Recipe Card

Delicious Pesto Shrimp Linguine for Perfect Dinners
Ingredients
- 8 oz linguine pasta
- 1 lb shrimp peeled and deveined
- 1 cup fresh basil pesto
- 2 tablespoons olive oil
- 3 cloves garlic minced
- 1/2 teaspoon red pepper flakes
- Salt and pepper to taste
- 1/4 cup freshly grated Parmesan cheese
- Fresh basil leaves for garnish
Instructions
- Cook the linguine pasta according to package instructions.
- Heat olive oil in a large skillet over medium heat.
- Add minced garlic and red pepper flakes to the skillet, sautéing until fragrant.
- Add the shrimp to the skillet, seasoning with salt and pepper.
- Toss in the cooked linguine and pesto, mixing well.
- Serve hot, garnished with Parmesan cheese and fresh basil.
Notes
Additional serving suggestions: pair with a crisp salad, garlic bread, or roasted seasonal vegetables for balance.
For make-ahead, prep components separately and assemble just before heating to preserve texture.
Taste and adjust with acid (lemon/vinegar) and salt right at the end to wake up flavors.


