Introduction
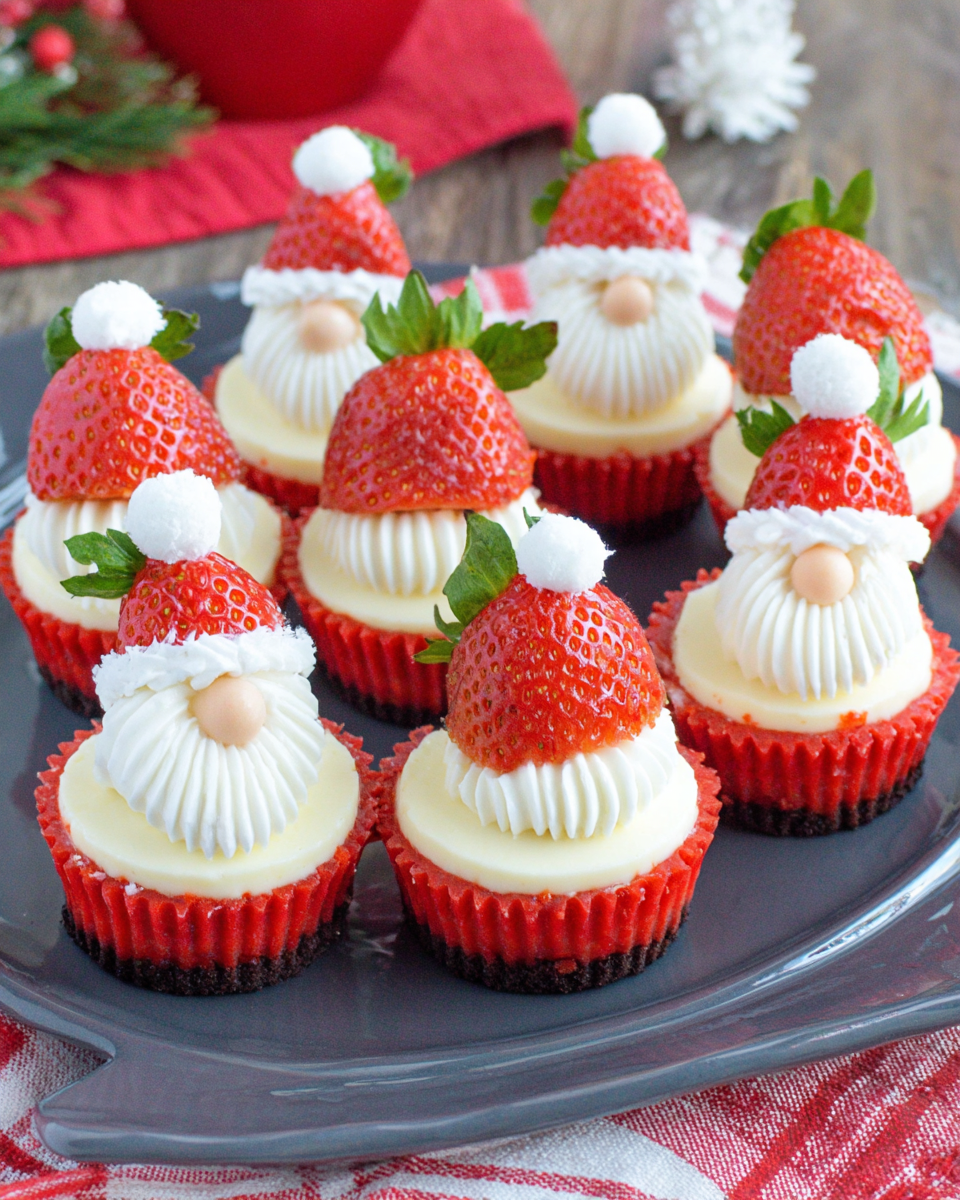
As the holiday season approaches, festive desserts come to mind. Cheesecake Strawberry Santas are a playful twist on the classic cheesecake, perfect for celebrating with friends and family. These delightful treats not only look adorable but also offer a delicious blend of creamy cheesecake and fresh strawberries.
Making these charming desserts can be a joyous activity with kids or a fun way to impress your holiday guests. The combination of rich, buttery crust and luscious strawberry topping makes each bite a piece of holiday magic. Let’s dive into crafting these delightful Cheesecake Strawberry Santas that will be the star of your dessert table.
Ingredients
- 1 cup graham cracker crumbs
These crumbs form the base for the cheesecake, giving it a crunchy texture that complements the creamy filling. - 1/4 cup granulated sugar
Sugar sweetens the crust, balancing the flavors and enhancing the overall taste of the cheesecake. - 1/4 cup unsalted butter, melted
Butter binds the graham cracker crumbs together, ensuring the crust holds its shape while adding richness. - 16 ounces cream cheese, softened
The primary ingredient of the cheesecake filling, cream cheese gives it that beloved creamy texture and tangy flavor. - 1/2 cup powdered sugar
Powdered sugar blends easily into the cream cheese, helping to create a smooth, sweet filling without grittiness. - 1 teaspoon vanilla extract
Vanilla enhances the flavor of the cheesecake, adding a warm note that complements the other ingredients. - 1 cup whipped cream
Whipped cream lightens the filling, creating a fluffy texture for the cheesecake and adding a decadent element. - Fresh strawberries, hulled (12-16 whole strawberries)
These strawberries transform into Santa hats, providing a festive and fruity topping to complement the cheesecake. - Mini chocolate chips (for eyes)
Chocolate chips are used for detailing the Santas' faces, adding fun visual interest to the finished desserts.
Directions & Preparation
Step 1: Prepare the crust by combining graham cracker crumbs, granulated sugar, and melted butter in a bowl.
This step is crucial as it creates the foundation for your cheesecake. The combination of graham cracker crumbs and butter should be moist enough to hold together when pressed into the pan. A well-mixed crust ensures that it will provide a consistent texture and flavor with every bite.
Step 2: Press the mixture into the bottom of a 9-inch springform pan evenly.
Evenly pressing the crust into the pan prevents it from being too thick in some areas, allowing for uniform baking. Use the bottom of a measuring cup or glass to compact the crust well. A well-formed crust will hold together nicely when serving the cheesecake.
Step 3: In a mixing bowl, beat the softened cream cheese and powdered sugar until smooth and creamy.
This step ensures that your cheesecake filling is free of lumps, which can affect the texture of the final product. Beating at medium speed allows for the incorporation of air, resulting in a light and fluffy filling that will be delightful when chilled.
Step 4: Add vanilla extract and whipped cream to the mixture, and gently fold until combined.
Folding in the whipped cream carefully allows you to maintain the airiness of the mixture, creating a lighter cheesecake. This step is essential to achieving the right creamy texture that balances with the rich flavor of the cream cheese.
Step 5: Pour the cheesecake filling over the prepared crust and smooth out the top with a spatula.
Evening out the top helps in achieving an aesthetic finish, making it easier to decorate later. It's also important for the cheesecake to bake evenly, preventing cracks while it sets.
Step 6: Refrigerate the cheesecake for at least 4 hours, or overnight, to allow it to set completely.
Setting the cheesecake is vital for its structure; without sufficient chilling time, the cheesecake may be too soft to cut neatly. Refrigerating overnight is ideal for stable, creamy layers that hold their shape when served.
Step 7: Once set, carefully remove the cheesecake from the springform pan.
Removing the cheesecake can be tricky, so it's best to run a knife around the edge beforehand. This will help prevent any parts from sticking and breaking. A clean removal guarantees a beautiful presentation.
Step 8: Top each cheesecake slice with fresh strawberries to create Santa hats, using a whole strawberry for the hat and half strawberries for the brim.
Strategically placing the strawberries not only adds beautiful color but also ties in the festive appearance. Make sure the strawberries are fresh and vibrantly colored to enhance the visual appeal of your Cheesecake Strawberry Santas.
Step 9: Use mini chocolate chips to create eyes on the Santas for a fun detail.
Placing the chocolate chips carefully adds personality to your cheesecakes, making them look like cheerful holiday figures. This small touch can elevate the overall presentation and make your dessert instantly recognizable.

Celebrating the Craft of Cheesecake
The art of making cheesecake is steeped in tradition and creativity. With an adaptable base and myriad toppings, this delightful dessert can be customized for any occasion. Cheesecake Strawberry Santas add a layer of festive fun, transforming a classic into a memorable centerpiece for holiday gatherings.
The Joy of Decorating Desserts
Decorating these Cheesecake Strawberry Santas offers a unique bonding experience for families, especially when involving kids in the process. The simple act of placing strawberries and chocolate chips can unleash creativity, turning dessert preparation into an enjoyable art project that culminates in sweet, festive treats.
Embracing Seasonal Ingredients
Using fresh, seasonal ingredients elevates the holiday dessert experience. Strawberries provide a burst of color while complementing the creamy cheesecake, making these Santas irresistible. Enjoying seasonal fruits not only enhances flavor but also connects your dessert to the vibrant harvest traditions of the season.
FAQs
What if my cheesecake is too soft after chilling?
If your cheesecake is too soft, it may not have chillled long enough. Ensure it's set for at least 4 hours or more for structural integrity.
Can I use a different berry instead of strawberries?
Yes, you can substitute with raspberries or blueberries for different flavors. Adjust the quantity based on the size of the berries.
What can I do if my crust is too thick?
If your crust turns out too thick, compress it firmly next time or use less crumb mixture. The goal is to have a balanced layer.
Can I make Cheesecake Strawberry Santas with a store-bought crust?
Absolutely! A pre-made graham cracker crust can save time and still yield delicious results.
What happens if I overwhip the cream?
Overwhipped cream can turn grainy and become butter-like. It's best to whip until soft peaks form for the right texture.
Can I scale this recipe to make more servings?
Yes, simply double or triple the ingredients and use a larger pan. Keep an eye on cooling times, as a larger cheesecake may need more time.
Conclusion
Cheesecake Strawberry Santas embody the festive spirit, combining playful presentation with a delightful taste that will please guests young and old. These treats are an excellent way to involve others in the kitchen, creating lovely memories during the holiday season.
By embracing the art of cheesecake-making, you’re not only treating yourself but also fostering creativity and joy in those around you. Make these Cheesecake Strawberry Santas a part of your holiday traditions and enjoy every delicious bite.
Recipe Card
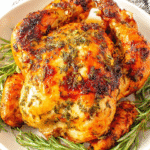
Savory Garlic Herb Roasted Chicken Delight
Ingredients
- 1 whole chicken 4-5 lbs
- 1 head of garlic cloves separated
- 2 tablespoons olive oil
- 1 tablespoon fresh thyme chopped
- 1 tablespoon fresh rosemary chopped
- 1 tablespoon fresh parsley chopped
- 1 lemon cut into wedges
- Salt and pepper to taste
Instructions
- Preheat the oven to 425°F (220°C).
- Prepare the chicken by patting it dry with paper towels.
- Rub olive oil all over the chicken, inside and out.
- Season generously with salt and pepper.
- Stuff the cavity with garlic cloves and lemon wedges.
- Sprinkle the herbs over the chicken and inside the cavity.
- Place the chicken in a roasting pan and tuck the wing tips under.
- Roast the chicken for approximately 1 hour and 15 minutes.
- Let the chicken rest for 10-15 minutes before carving.
Notes
Additional serving suggestions: pair with a crisp salad, garlic bread, or roasted seasonal vegetables for balance.
For make-ahead, prep components separately and assemble just before heating to preserve texture.
Taste and adjust with acid (lemon/vinegar) and salt right at the end to wake up flavors.


