Introduction
Classic New York cheesecake is a timeless dessert that has captured hearts and taste buds for generations. Its dense, creamy texture and rich flavor make it a favorite for special occasions and casual gatherings alike.
Crafting a perfect New York cheesecake requires attention to detail and quality ingredients, but the process is rewarding and fairly straightforward. With this recipe, you will learn how to create a show-stopping cheesecake that is sure to impress.
Ingredients
- 2 cups graham cracker crumbs
Graham cracker crumbs form the crunchy base of the cheesecake, providing texture and a mild sweetness that balances the rich filling. - 1/2 cup unsalted butter, melted
Butter adds richness and binds the graham cracker crumbs together to create a stable crust that holds its shape when sliced. - 3 (8 oz) packages cream cheese, softened
Cream cheese is the star of the show, delivering the signature creamy texture and tangy flavor that defines a New York cheesecake. - 1 cup granulated sugar
Sugar sweetens the cheesecake, balancing the tanginess of the cream cheese and contributing to the overall texture. - 3 large eggs
Eggs provide structure and stability to the cheesecake, helping it set as it bakes and adding to the overall moisture content. - 1 teaspoon pure vanilla extract
Vanilla enhances the flavor profile, adding depth and a subtle aromatic quality that complements the richness of the cheesecake. - 1 tablespoon lemon juice
Lemon juice brightens the cheesecake, cutting through the richness and adding a refreshing tartness that balances the flavors.
Directions & Preparation
Step 1: Preheat your oven to 325°F (160°C).
Preheating the oven ensures that the cheesecake will cook evenly from the moment it goes in. The moderate temperature is essential for a gentle bake, preventing cracks while allowing the filling to set.
Step 2: Prepare the crust by combining graham cracker crumbs and melted butter in a bowl.
Mixing the crumbs with melted butter ensures that every bit is coated, leading to a cohesive crust. This step is crucial—if the mixture is dry, the crust won’t hold together, but if it’s too wet, it will be soggy.
Step 3: Press the crust mixture firmly into the bottom of a 9-inch springform pan.
Using your fingers or the bottom of a glass, press the mixture down tightly to form an even base. This compaction is key to a sturdy crust that can support the heavy cheesecake filling.
Step 4: Bake the crust for 10 minutes and then let it cool.
Baking the crust helps it set and enhances the flavor through slight caramelization. Allowing it to cool prevents the warm crust from melting the cheesecake filling during assembly.
Step 5: In a large bowl, beat the softened cream cheese until smooth and creamy.
Beating the cream cheese removes lumps, resulting in a silky filling. A smooth texture is necessary to achieve that classic New York cheesecake mouthfeel, free from any graininess.
Step 6: Add sugar, and beat until well combined and fluffy.
Incorporating sugar at this stage not only sweetens the filling but also aerates it slightly, leading to a light, creamy texture. Proper mixing is critical for even distribution.
Step 7: Add the eggs one at a time, mixing well after each addition.
Adding eggs incrementally ensures each one is fully incorporated before adding the next. This creates a cohesive filling and helps prevent overmixing, which can lead to cracks.
Step 8: Stir in the vanilla extract and lemon juice until just combined.
These flavorings should be gently mixed in to retain the airiness of the batter. Overmixing at this stage could incorporate too much air, risking the integrity of the cheesecake as it bakes.
Step 9: Pour the filling onto the cooled crust, smoothing the top.
Carefully pouring the filling helps to maintain the crust’s structure. Smoothing the top ensures a polished appearance and allows for even cooking.
Step 10: Bake the cheesecake for 60-70 minutes, until the edges are set but the center is slightly jiggly.
Baking at the right temperature until just set prevents cracks and allows for an ideal creamy texture. The residual heat will continue to cook the center after removing it from the oven.
Step 11: Turn off the oven, crack the door, and let the cheesecake cool in the oven for an hour.
This gradual cooling process helps prevent the cheesecake from sinking or cracking by reducing the temperature change it experiences, which can cause it to seize.
Step 12: Chill the cheesecake in the refrigerator for at least 4 hours or overnight before serving.
Chilling is crucial for a firm texture and allows the flavors to meld together. A well-chilled cheesecake is easier to slice and showcases its creamy filling beautifully.

Choosing the Right Cream Cheese
Opt for full-fat cream cheese made from real dairy to achieve the desired richness and smooth texture in your cheesecake. Avoid lower-fat varieties or whipped cream cheese, as they may introduce excess air or lack the necessary richness, leading to a cheesecake that doesn't set properly.
Variations on the Classic Recipe
While the classic cheesecake is a beloved standard, feel free to experiment with flavor variations. Add a swirl of raspberry or chocolate ganache on top, or fold in crushed cookies for added texture. These variations can personalize your cheesecake while maintaining its core characteristics.
Serving Suggestions
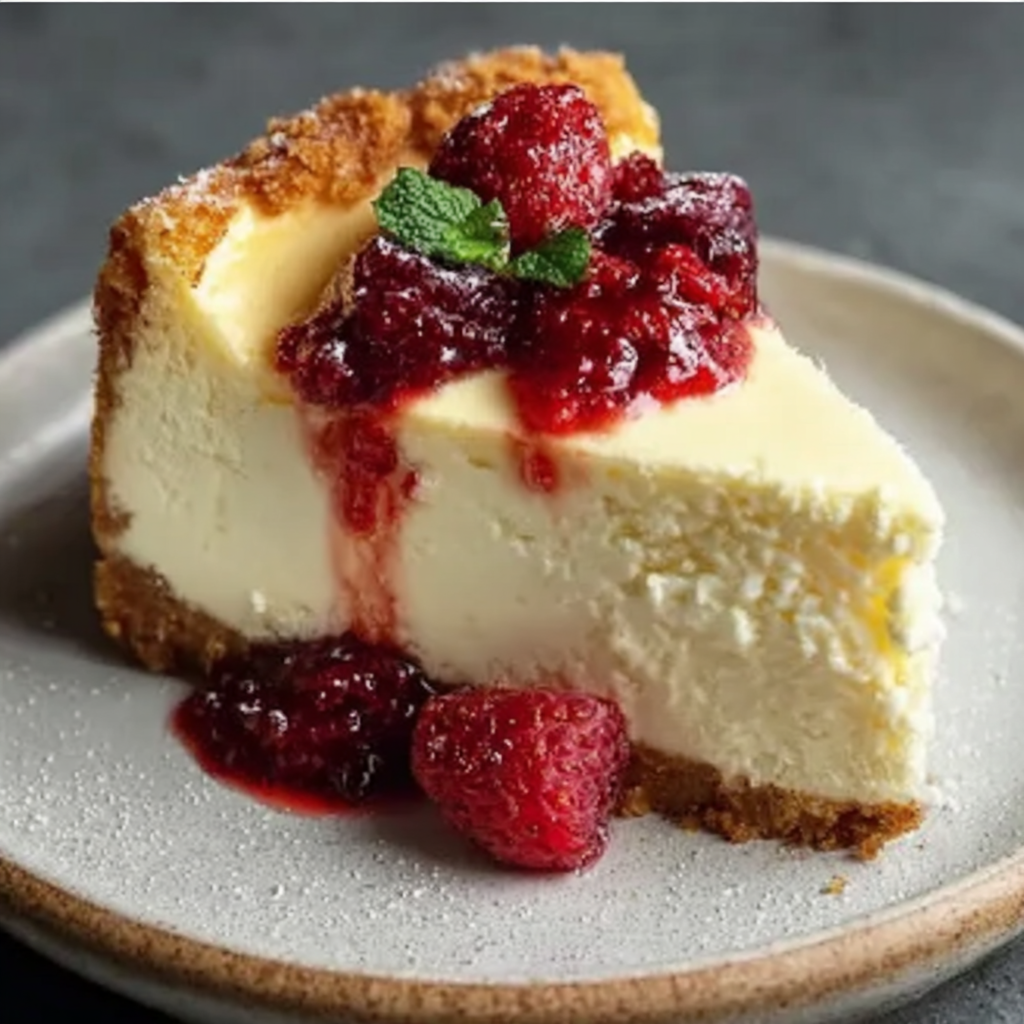
This cheesecake is versatile and can be served plain or adorned with a variety of toppings. Fresh berries, a dusting of powdered sugar, or a drizzle of caramel or chocolate can enhance its appeal for special occasions. Consider serving it alongside a fruit compote for a delightful contrast.
FAQs
What should I do if my cheesecake cracks during baking?
Cracks often occur due to rapid temperature changes. To prevent this, let the cheesecake cool gradually in the oven with the door slightly ajar.
Can I use a different type of crust?
Certainly! While graham cracker is traditional, you can experiment with chocolate cookie crumbs, crushed nuts, or even a classic pie crust.
What if my cheesecake filling is too thin?
If the filling is too thin, make sure you have incorporated enough cream cheese and eggs. If necessary, you can bake it a bit longer to help firm it up.
Is it normal for the cheesecake to jiggle a bit when I take it out?
Yes, a slight jiggle in the center is normal; it will set as it cools. Just be sure the edges are firm before removing it.
How can I adjust the sweetness of the cheesecake?
You can decrease the sugar slightly if you prefer a less sweet cheesecake. Just remember that sugar also affects the texture.
Can I use low-fat cream cheese for this recipe?
Using low-fat cream cheese may affect the texture and creaminess of the cheesecake. For best results, stick to full-fat cream cheese.
Conclusion
Creating a classic New York cheesecake at home is an enjoyable and fulfilling endeavor. With the right ingredients and a little patience, you can master this iconic dessert that numerous people adore.
Serve it proudly at your next gathering, knowing you've crafted a dessert that reflects both tradition and your personal touch. Enjoy every creamy, decadent bite!
Recipe Card

Butternut Squash Pasta with Sausage and Spinach Recipe
Ingredients
- 8 ounces pasta your choice
- 1 medium butternut squash peeled and cubed
- 1 pound Italian sausage mild or spicy
- 2 cups fresh spinach
- 1 onion diced
- 4 cloves garlic minced
- 1 teaspoon dried rosemary
- 1/2 cup grated Parmesan cheese
- Salt and pepper to taste
- 2 tablespoons olive oil
Instructions
- Preheat your oven to 400°F (200°C).
- Toss the cubed butternut squash in 1 tablespoon of olive oil, salt, and pepper. Spread on a baking sheet and roast for 25-30 minutes.
- Meanwhile, cook the pasta according to package instructions until al dente. Drain and set aside.
- In a large skillet, heat the remaining tablespoon of olive oil over medium heat. Add the diced onion and garlic, sauté until translucent.
- Add the Italian sausage to the skillet. Break it apart and cook until browned and cooked through.
- Stir in the roasted butternut squash, spinach, and rosemary into the skillet, cooking until the spinach wilts.
- Add the cooked pasta to the skillet and toss everything together. Sprinkle in the Parmesan cheese and mix until melted.
- Season with salt and pepper to taste, then serve warm.
Notes
Additional serving suggestions: pair with a crisp salad, garlic bread, or roasted seasonal vegetables for balance.
For make-ahead, prep components separately and assemble just before heating to preserve texture.
Taste and adjust with acid (lemon/vinegar) and salt right at the end to wake up flavors.


