Introduction
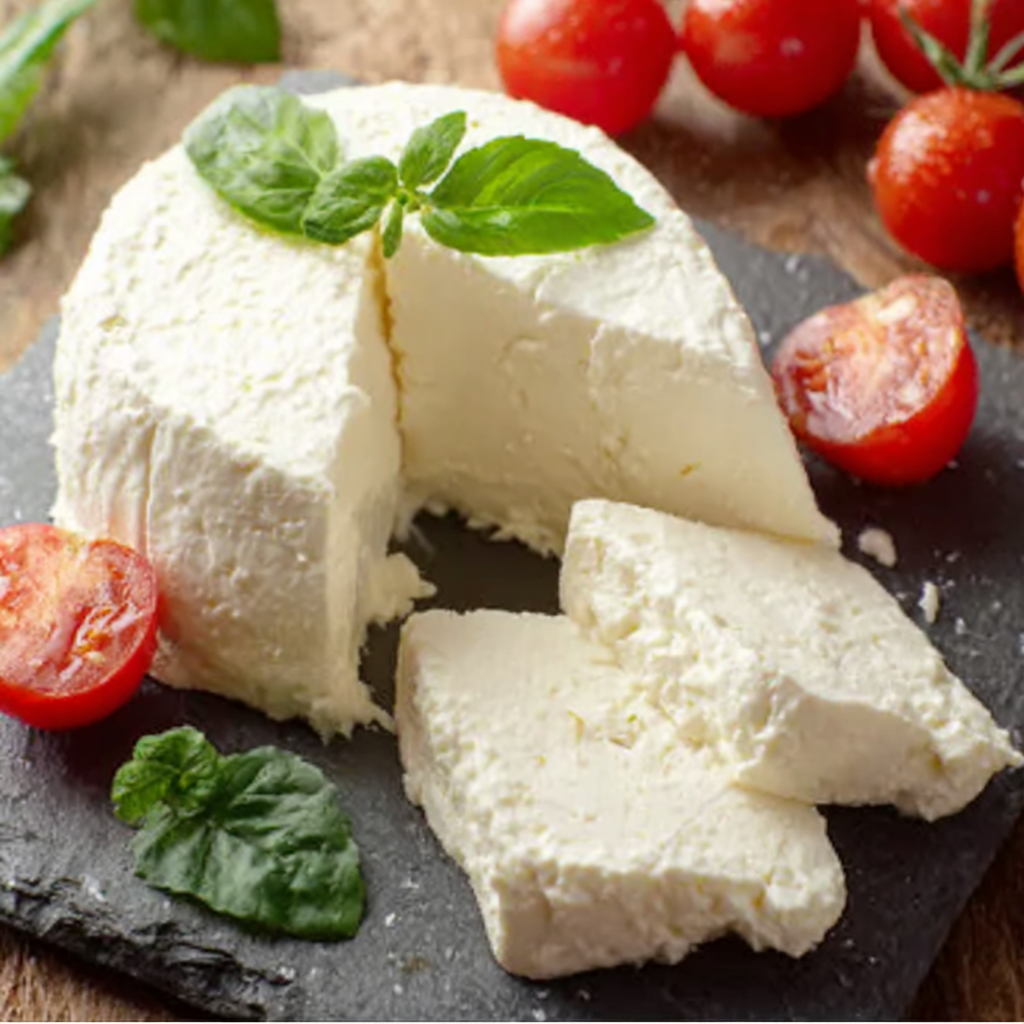
Mozzarella cheese, with its creamy texture and mild flavor, is an essential component in many culinary traditions. Making it at home is surprisingly simple and greatly rewarding. By creating your own cheese, you can achieve a freshness and flavor that store-bought varieties often lack.
The process of transforming milk into mozzarella can seem daunting, but with a little patience and practice, you’ll be able to craft this delightful cheese. Whether it's for a classic Caprese salad or a gooey pizza topping, fresh mozzarella steals the show in countless dishes.
This recipe will walk you through the essential ingredients and steps needed to create your very own mozzarella cheese. Let’s dive into the world of cheese-making and uncover the delicious potential of homemade mozzarella.
Ingredients
- 1 gallon whole milk
High-quality whole milk is essential for achieving the rich, creamy texture characteristic of mozzarella. Look for milk that is unprocessed and lacking additives for the best results. - 1/4 tsp liquid rennet
Rennet helps to coagulate the milk, separating it into curds and whey. Liquid rennet is often preferred due to its ease of use and consistent results. - 1/4 cup white vinegar or lemon juice
The acid from vinegar or lemon juice aids the curdling process, contributing to the cheese's texture and flavor. Choose the acid based on your flavor preference. - Salt to taste
Salt enhances the flavor of the mozzarella and acts as a preservative. Adjust the amount based on personal preference, but don't skip it altogether. - Optional: herbs or spices
Add herbs (like basil or oregano) or spices (like garlic powder) to infuse your mozzarella with extra flavor, making it even more delicious in your dishes.
Directions & Preparation
Step 1: Heat the milk slowly in a large pot to 190°F.
Heating the milk slowly ensures that it reaches the right temperature without scorching. Stir it gently to prevent it from sticking to the bottom of the pot. Use a thermometer to check the temperature accurately; this step is crucial for achieving the desired curd formation.
Step 2: Stir in the vinegar or lemon juice and let it sit for 5 minutes.
Adding the acid will prompt the milk to curdle. As you let it rest, you will notice the curds beginning to form. This waiting period is essential, as it allows the proteins to coagulate fully, creating a robust curd that will hold together well during shaping.
Step 3: Add the liquid rennet and gently stir for another 30 seconds.
Rennet further assists in curd formation by acting on milk proteins. Stirring gently ensures even distribution, allowing the rennet to work effectively. After stirring, these curds will begin to separate more prominently from the whey, which is a key sign of success.
Step 4: Cover the pot and let the mixture rest for 10 minutes.
Covering the pot retains heat and allows the curds to form completely. During this resting time, the rennet will act on the milk, leading to a firmer curd. Be patient—this step is where the magic of cheese-making occurs.
Step 5: Cut the curds into 1-inch cubes with a knife.
Cutting the curd allows the whey to escape and helps firm up the curds. This step also ensures the curds have more surface area for further heating, which is essential for reaching that stretchy mozzarella consistency. Use a long knife to make clean cuts and maintain the integrity of the curds.
Step 6: Gently heat the curds to 190°F while stirring slowly.
As you heat the curds, their proteins will tighten, leading to that characteristic stretchiness. Stirring gently prevents the curds from breaking too much, helping them retain shape. Observe closely to avoid overheating, as this could lead to rubbery cheese.
Step 7: Spoon off the whey carefully and transfer the curds into a heat-safe bowl.
Once you've removed the whey, it's time to star the kneading process that gives mozzarella its texture. Transferring the curds while they're hot helps them stay pliable. Use a slotted spoon for this step to avoid breaking the curds further.
Step 8: Knead the curds until they become smooth and elastic, adding salt to taste.
This is the fun part! Kneading helps develop the mozzarella's signature texture. As you work the curds, they’ll become increasingly smooth. Adding salt at this stage not only enhances flavor but also assists in further moisture control, creating the perfect cheese.
Step 9: Shape the mozzarella into balls and place them in cool water.
Shaping the cheese while still warm allows you to form perfect balls that can be used immediately or stored for later. Cooling the mozzarella in water helps to firm it up a bit more, while also maintaining the moisture content. The cooling process will lock in that delicious, fresh flavor.

Embracing the Art of Stretching Cheese
Stretching is an essential aspect of crafting mozzarella, infusing it with its unique texture. While kneading the curds, be attentive to how they feel. As the cheese warms, it becomes more pliable—this is when you can really start to create that beautiful, stretchy consistency. The stretch not only enhances the texture but also impacts the mouthfeel when you enjoy your homemade cheese.
The Role of Ingredients in Cheese Making
Each ingredient in mozzarella-making plays a vital role. Whole milk forms the foundation, creating richness, while acids contribute to the curd structure and flavor. Rennet’s coagulating power is crucial—it helps the curds become firm. Salt not only enhances flavor but also acts as a preservative. Understanding each ingredient's purpose allows you to appreciate the process and results.
Variations on a Classic Mozzarella Recipe
Once you've mastered basic mozzarella, consider experimenting by infusing flavors. Adding fresh herbs, garlic, or even chili flakes during the kneading stage can yield exciting results. Alternatively, try making burrata, a creamy cousin of mozzarella, by encasing a rich cream filling in a mozzarella ball, elevating your cheese-making journey even further.
FAQs
What should I do if my cheese isn't stretchy?
If your mozzarella isn't stretchy, it may not have been kneaded or heated enough. Reheat it gently while kneading to help develop the elastic properties.
Can I use low-fat milk instead?
Low-fat milk won’t yield the same richness or texture as whole milk. For the best mozzarella, stick with whole milk.
What if my curds aren't forming after adding rennet?
If the curds don't form, check the temperature of the milk; it may have been too low. Adjusting the heat may help activate the rennet more effectively.
How can I ensure my mozzarella has enough flavor?
Make sure to season your curds adequately with salt during the kneading phase. You can also experiment with herbs and spices for additional flavor.
Is it possible to make flavored mozzarella?
Absolutely! Mixing in herbs, garlic, or spices during the kneading process creates unique flavor profiles, so get creative.
What if my curds break apart while heating?
This can happen if the temperature is too high or if they are stirred too vigorously. Ensure you maintain gentle heat and stir softly.
Conclusion
Making mozzarella cheese at home is both an art and a science, but the rewards are immeasurable. A ball of fresh, warm mozzarella can elevate your culinary creations, and the satisfaction of making it yourself is genuinely fulfilling.
With practice and a bit of patience, you'll find this process becomes second nature. Enjoy your homemade mozzarella on pizzas, salads, or simply on its own—every bite will remind you of the joy of crafting something truly exceptional.
Recipe Card

Irresistible No-Bake Salted Caramel Pretzel Bars
Ingredients
- 2 cups crushed pretzels
- 1 cup unsalted butter
- 3/4 cup brown sugar
- 1 cup sweetened condensed milk
- 1 cup semi-sweet chocolate chips
- 1 teaspoon sea salt
Instructions
- Prepare the crust by mixing crushed pretzels, melted butter, and brown sugar.
- Make the caramel layer by combining sweetened condensed milk and brown sugar.
- Pour the caramel mixture over the pretzel crust and spread evenly.
- Melt the chocolate chips and pour over the caramel layer.
- Sprinkle sea salt over the chocolate layer.
- Refrigerate until set, then cut into bars.
Notes
Additional serving suggestions: pair with a crisp salad, garlic bread, or roasted seasonal vegetables for balance.
For make-ahead, prep components separately and assemble just before heating to preserve texture.
Taste and adjust with acid (lemon/vinegar) and salt right at the end to wake up flavors.