Introduction
As the festive season approaches, the aroma of freshly baked cookies fills the air, igniting the spirit of Christmas. Among the myriad of holiday treats, peppermint swirl cookies stand out for their delightful flavor and vibrant colors. These cookies not only look beautiful but also taste fantastic, making them a perfect addition to any holiday gathering.
Whether you’re gearing up for a family celebration or simply want to spread some cheer to your neighbors, these cookies fit the bill. Their unmistakable peppermint flavor combined with a delightful swirl pattern makes them both fun to make and to eat. They are sure to become a beloved tradition in your holiday baking repertoire.
Ingredients
- 2 ½ cups all-purpose flour
All-purpose flour provides the structure to the cookies, ensuring they hold their shape while still being soft and chewy. Flour creates gluten when combined with wet ingredients, which gives the cookies a nice texture. - 1 tsp baking powder
Baking powder acts as a leavening agent in the cookie dough, helping the cookies to rise slightly while baking. This results in a lighter, airier texture that contrasts beautifully with the chewy parts. - ½ tsp salt
Salt enhances the overall flavor of the cookies, balancing the sweetness from the sugar. It also brings out the peppermint aroma, making each bite more flavorful. - ¾ cup unsalted butter, softened
Butter contributes to the richness and tenderness of the cookies. Using unsalted butter allows for better control of the salt content, ensuring a well-balanced flavor. - 1 cup granulated sugar
Granulated sugar is essential for sweetness and also helps to create a slight crispiness on the outside of the cookie. It aids in the spreading of the dough during baking. - 1 egg
An egg adds moisture to the dough and acts as a binder, helping to hold the ingredients together. It also contributes to the richness and can help with the rise of the cookies. - 1 tsp vanilla extract
Vanilla extract adds a warm, aromatic flavor that complements the peppermint. This flavor component rounds out the sweetness and adds depth to the cookie. - ½ cup peppermint extract
Peppermint extract is the star ingredient that gives these cookies their signature flavor. It infuses the dough with a refreshing minty taste that is especially iconic during the holiday season. - Red food coloring
Food coloring is optional for creating the festive swirl effect. It allows you to visually distinguish the peppermint flavor, making the cookies not just tasty but visually appealing. - 1 cup white chocolate chips (optional)
White chocolate chips can add a creamy sweetness that pairs wonderfully with the peppermint flavor. They're optional, but they do elevate the cookies to a more decadent treat.
Directions & Preparation
Step 1: Preheat the oven to 350°F (175°C).
Preheating the oven is a crucial step to ensure that cookies bake evenly right from the start. An oven that is set at the correct temperature helps to maintain the integrity of the cookie structure, leading to that desired chewy texture.
Step 2: In a large bowl, cream together the softened butter and granulated sugar until light and fluffy.
Creaming butter and sugar introduces air into the mixture, creating a light base that contributes to the cookie’s texture. This process is essential as it helps the cookies rise and become tender. Ensure the butter is at room temperature for the best results.
Step 3: Add the egg and vanilla extract, mixing until well combined.
Incorporating the egg and vanilla into the creamed mixture adds moisture and enhances flavor. This step ensures that the egg is properly mixed in, contributing to the rich taste and smooth texture of the final cookies.
Step 4: In another bowl, whisk together the flour, baking powder, and salt.
Whisking together the dry ingredients before combining them with the wet ingredients helps distribute the baking powder and salt evenly, preventing uneven baking and ensuring every cookie is perfectly balanced.
Step 5: Gradually add the dry mixture to the butter-sugar mixture, mixing until just combined.
Mixing just until combined helps to avoid overworking the dough, which can lead to tough cookies. This ensures that the cookies remain chewy rather than dense.
Step 6: Divide the dough in half and mix in the peppermint extract and red food coloring to one half of the dough.
Dividing the dough allows for the creation of a striking swirl effect. The food coloring ensures that the peppermint portion is visually distinct, adding to the festive appeal of the cookies.
Step 7: Scoop spoonfuls of each dough onto a clean surface, alternating colors, and gently roll them together to form a log.
This step is where the magic happens! Alternating spoonfuls of the two doughs and rolling them together creates the beautiful peppermint swirl. Be gentle to avoid overmixing, which could muddy the colors.
Step 8: Chill the cookie log in the refrigerator for at least 1 hour.
Chilling the cookie dough helps it firm up, making it easier to slice and resulting in cleaner edges. This step also aids in preventing the cookies from spreading too much during baking.
Step 9: Once chilled, slice the log into ¼-inch slices and place them on a baking sheet lined with parchment paper.
Slicing the dough to a uniform thickness ensures even baking, helping all cookies to cook at the same rate. The parchment paper prevents sticking and aids in an even brown on the bottom.
Step 10: Bake in the preheated oven for 10-12 minutes, until the edges are lightly golden.
Monitoring the baking time is essential; in this stage, the cookies will set while retaining a soft center. Pulling them from the oven when the edges turn golden ensures that they remain chewy without overcooking.
Step 11: Allow the cookies to cool on the baking sheet for a few minutes before transferring to a wire rack.
Cooling the cookies on the baking sheet allows them to firm up, making it easier to move them without breaking. Transferring to a wire rack helps them cool evenly and prevents sogginess.

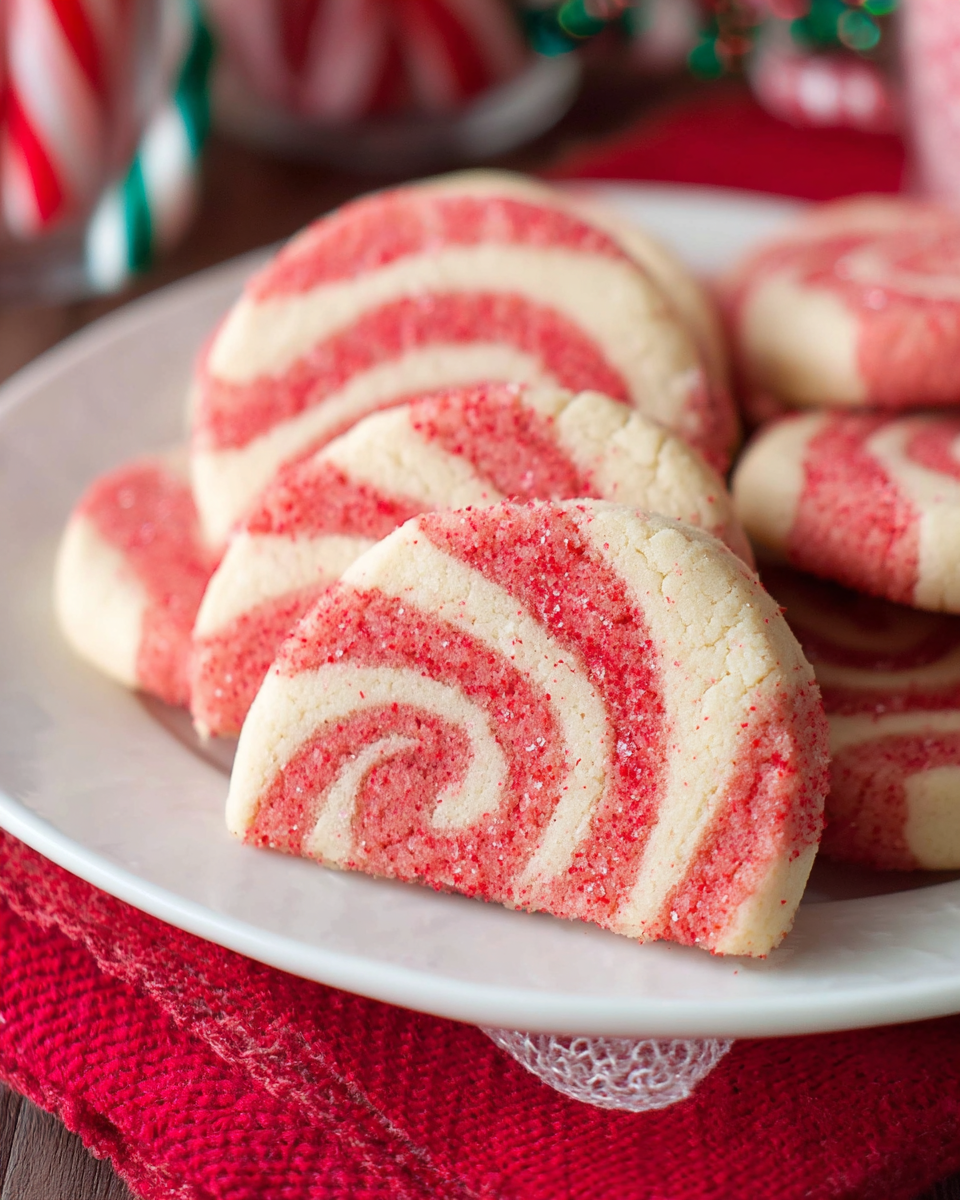
Creating the Perfect Swirl
Achieving a striking swirl in your peppermint cookies is half the fun and has a few key techniques. Make sure to roll the contrasting doughs gently and carefully, allowing each color to maintain its integrity. Experiment with the amount of food coloring until you reach the desired shade, and remember, a little goes a long way. The visual appeal of your cookies will surely impress anyone who lays eyes on them.
Pairing with Refreshing Flavors
These peppermint swirl cookies are versatile enough to complement various festive beverages. Consider enjoying them alongside a warm cup of hot cocoa or a refreshing peppermint tea. Their sweet and minty flavor works as a lovely contrast to the rich, creamy notes of hot drinks, enhancing the overall festive experience.
Creative Variations to Explore
Once you've mastered the basic peppermint swirl, there are numerous ways to personalize this cookie recipe. Consider adding crushed candy canes for an extra crunch or swapping out the white chocolate chips for dark chocolate for a more sophisticated flavor. You could also experiment with different extracts, such as almond or orange, to create exciting new flavor profiles that keep your holiday baking fresh.
FAQs
What if my cookie dough seems too soft?
If your dough is too soft to handle, it may benefit from an additional chill time. Refrigerate it for another 30 minutes to firm it up, which makes it easier to slice.
How can I enhance the peppermint flavor if it’s too subtle?
If you feel the peppermint flavor is lacking, consider adding an extra teaspoon of peppermint extract. Just be cautious, as too much can overwhelm the balance.
What should I do if my cookies spread too much while baking?
If your cookies spread excessively, it may be due to insufficient chilling of the dough. Ensuring a thorough chill before baking will help maintain their shape.
Can I adjust the sugar in the recipe to make them less sweet?
You may reduce the sugar by up to ¼ cup without significantly affecting the structure, but keep in mind that this could alter the cookie's final taste and texture.
What if my cookie edges are browning too quickly?
If the edges are browning too quickly, consider reducing the oven temperature by 25°F (about 15°C). This allows the center to bake through without overbaking the edges.
Can I add different extracts to change the flavor?
Yes, you can experiment with other extracts such as almond or coconut as substitutes for some or all of the peppermint extract. This introduces new flavor dimensions to the cookies.
What do I do if the cookie dough is too crumbly?
If your dough is too crumbly to hold together, try adding a teaspoon of milk or water at a time until it reaches the proper consistency.
Conclusion
Making peppermint swirl cookies adds joy to your holiday festivities. With a delightful combination of flavors and a visually stunning presentation, these cookies are sure to delight family and friends.
Don't shy away from experimenting with variations and flavors; make them your own! Happy baking, and may your holidays be filled with warmth, sweetness, and cherished moments.
Recipe Card

Delicious Pesto Shrimp Linguine for Perfect Dinners
Ingredients
- 8 oz linguine pasta
- 1 lb shrimp peeled and deveined
- 1 cup fresh basil pesto
- 2 tablespoons olive oil
- 3 cloves garlic minced
- 1/2 teaspoon red pepper flakes
- Salt and pepper to taste
- 1/4 cup freshly grated Parmesan cheese
- Fresh basil leaves for garnish
Instructions
- Cook the linguine pasta according to package instructions.
- Heat olive oil in a large skillet over medium heat.
- Add minced garlic and red pepper flakes to the skillet, sautéing until fragrant.
- Add the shrimp to the skillet, seasoning with salt and pepper.
- Toss in the cooked linguine and pesto, mixing well.
- Serve hot, garnished with Parmesan cheese and fresh basil.
Notes
Additional serving suggestions: pair with a crisp salad, garlic bread, or roasted seasonal vegetables for balance.
For make-ahead, prep components separately and assemble just before heating to preserve texture.
Taste and adjust with acid (lemon/vinegar) and salt right at the end to wake up flavors.


