Introduction
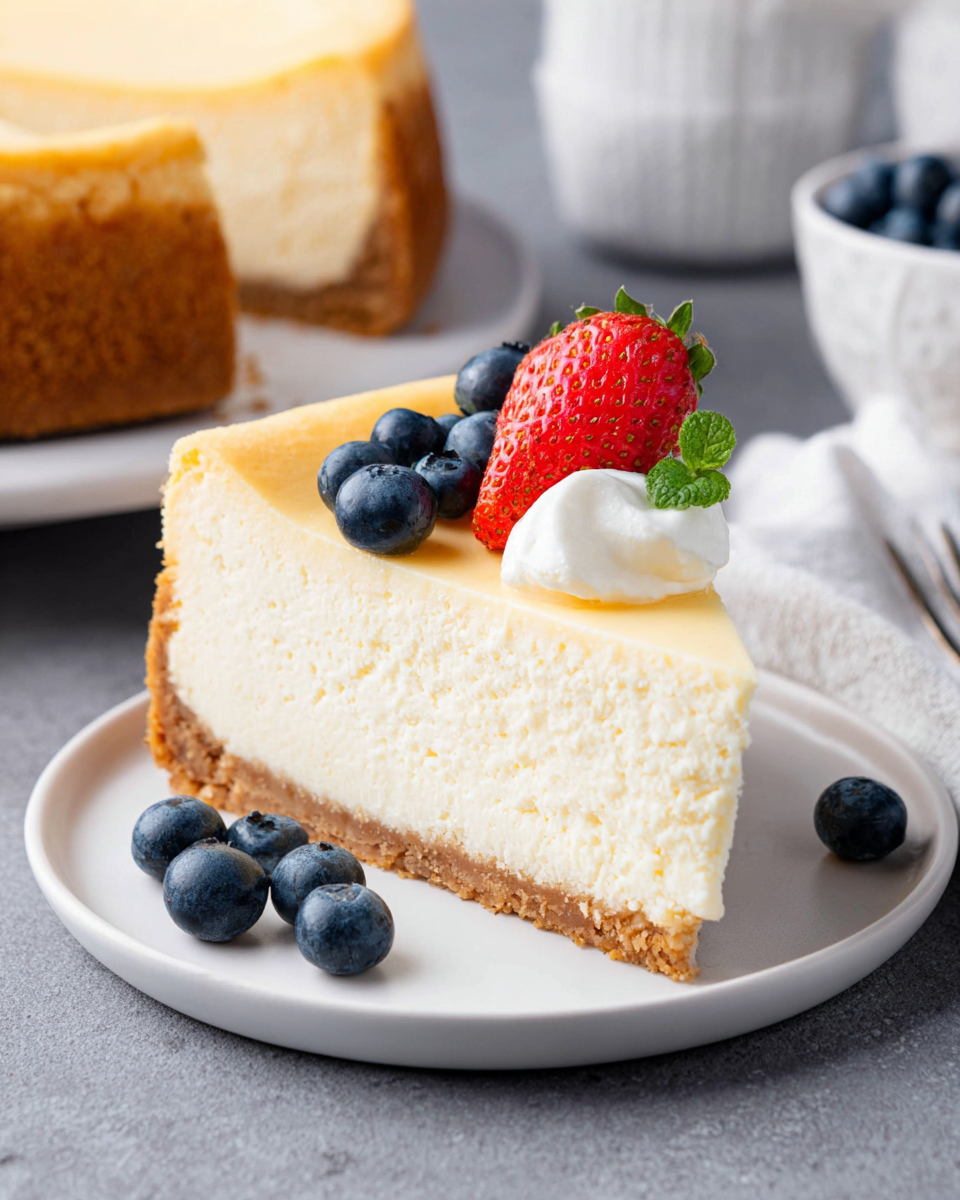
Classic New York-Style Cheesecake is a culinary treasure that embodies the rich, creamy essence of tradition. Renowned for its dense texture and velvety mouthfeel, this cheesecake stands out in the dessert world, effortlessly captivating taste buds.
It's a dessert that invokes a sense of nostalgia, often associated with special occasions, family gatherings, and celebrations in the heart of New York City. With its simple yet sophisticated profile, this cheesecake is a perfect canvas for flavors to shine, whether adorned with a fruit glaze or served plain.
Ingredients
- 2 cups graham cracker crumbs
Graham cracker crumbs form a buttery crust that provides a slightly sweet and crunchy base. Their flavor complements the richness of the cheesecake while also enhancing its texture. - 1/2 cup unsalted butter, melted
Unsalted butter adds richness and moisture to the crust, helping to bind the crumbs together. Melting the butter ensures an even distribution throughout the crust mixture. - 4 (8-ounce) packages cream cheese, softened
Cream cheese is the star of the cheesecake, imparting its distinct tanginess and creamy texture. Soften it for easier mixing, resulting in a smooth batter without lumps. - 1 cup granulated sugar
Sugar adds sweetness to balance the tang of the cream cheese. It also plays a crucial role in creating a silky-smooth batter when blended properly. - 1 teaspoon vanilla extract
Vanilla extract enhances the overall flavor of the cheesecake, bringing warmth and depth to each bite. It acts as an aromatic complement to the cream cheese. - 3 large eggs
Eggs provide structure and stability to the cheesecake. They also help create a creamy texture when combined correctly, adding richness and preventing the cheesecake from cracking. - 2 teaspoons lemon juice
Lemon juice adds a subtle tang that brightens the flavor profile, enhancing the cheesecake's richness. It also helps balance the sweetness and adds freshness.
Directions & Preparation
Step 1: Preheat the oven to 350°F (175°C).
Preheating the oven is essential to ensure an even baking environment for the cheesecake. This step helps set the right temperature for the crust and batter, which is crucial for achieving that perfect creamy texture.
Step 2: Prepare the crust by combining graham cracker crumbs and melted butter in a bowl.
Mixing the graham cracker crumbs with melted butter forms a moist, cohesive mixture. This combination will set the foundation for your cheesecake, giving it a delightful crunch that complements the creamy filling.
Step 3: Press the mixture firmly into the bottom of a springform pan and set aside.
Pressing the crumb mixture into the pan creates a solid base for your cheesecake. Make sure to pack it down firmly to prevent crumbling and to create a barrier that retains the filling during baking.
Step 4: In a large mixing bowl, beat the softened cream cheese until smooth and fluffy.
Beating the cream cheese until smooth is crucial for a lump-free filling. This step introduces air into the mixture, contributing to a lighter texture and ensuring that the other ingredients blend seamlessly.
Step 5: Gradually add the sugar and continue beating until well combined.
Incorporating the sugar gradually allows it to dissolve completely, preventing gritty textures. This step is essential for sweetness and aids in achieving a silky consistency within the batter.
Step 6: Add the eggs one at a time, mixing well after each addition.
Adding the eggs individually allows for better integration into the batter, contributing to its smoothness. Overmixing after adding eggs can incorporate excess air, leading to cracks during baking.
Step 7: Stir in the vanilla extract and lemon juice until combined.
This step infuses the batter with flavor while maintaining its smooth consistency. Vanilla and lemon juice work together to enhance the cheesecake's overall profile, without overpowering the rich creaminess.
Step 8: Pour the filling over the prepared crust in the springform pan.
Pouring the filling gently over the crust ensures an even distribution without disturbing the base. Taking care in this step helps maintain the integrity of the crust and results in a visually appealing cheesecake.
Step 9: Bake in the preheated oven for 55-60 minutes, or until the edges are set but the center still jiggles slightly.
Baking until the edges are set and the center jiggles slightly indicates that the cheesecake is done. This ensures it will firm up as it cools, achieving the desired creamy texture without being overcooked.
Step 10: Turn off the oven and let the cheesecake cool in the oven with the door ajar for about 1 hour.
Cooling the cheesecake in the oven with the door ajar prevents sudden temperature changes, which can lead to cracks. This gradual cooling allows the cake to settle evenly, enhancing its texture.
Step 11: Refrigerate for at least 4 hours, preferably overnight, before serving.
Chilling the cheesecake is crucial for achieving the perfect texture. The flavors meld together while the cake firms up, resulting in a rich, creamy dessert that is slice-ready.

Creating the Perfect Graham Cracker Crust
The graham cracker crust acts as the foundation for a classic New York-Style cheesecake, providing a contrast to the creamy filling. Use fresh, high-quality graham crackers for the best flavor and texture. When mixing, make sure the butter fully saturates the crumbs; this prevents crumbling. Pack it tightly into the pan and pre-bake if a firmer base is desired.
The Importance of Softened Cream Cheese
Softened cream cheese is vital for a smooth cheesecake batter. Cold cream cheese can lead to lumps that ruin the final texture. Let it sit at room temperature for at least an hour before mixing. A properly softened cream cheese blends seamlessly with sugar, eggs, and flavorings, ensuring a creamy, dense texture that is characteristic of traditional New York cheesecake.
Tips for a Silky-Smooth Filling
Achieving a silky filling requires attention to detail during the mixing process. Start with soft ingredients and beat them until fully combined. Avoid overmixing once the eggs are added; this can introduce air and lead to unwanted cracks during baking. The use of a water bath during baking can also help maintain moisture and temperature for an even, smooth dessert.
FAQs
What can I do if my cheesecake comes out too dense?
A dense cheesecake can result from overmixing the batter or using cold cream cheese. Ensure cream cheese is at room temperature for a smooth mixture and limit mixing once the eggs are added.
Can I scale this recipe for a larger gathering?
Yes, this recipe can easily be doubled. Use a larger springform pan and adjust the baking time accordingly, keeping an eye on the cheesecake as it bakes.
What should I do if my cheesecake cracks while baking?
Cracks are often a result of rapid temperature changes or overmixing. To minimize this, bake it in a water bath and allow it to cool gradually in the oven.
Can I use a different type of crust?
Absolutely! While the traditional graham cracker crust is classic, you can experiment with digestive biscuits, Oreos, or even a nut-based crust for a unique twist.
What if I want to add flavors like chocolate or fruit?
You can fold in chocolate or fruit puree to the batter before pouring it into the crust. Just be careful not to add too much liquid, which can affect the cheesecake's texture.
How do I know when my cheesecake is done baking?
The edges should be set but the center should still jiggle slightly. It will firm up as it cools, achieving the perfect creamy consistency.
Conclusion
Classic New York-Style Cheesecake is more than just a dessert; it’s a celebration of flavor and texture that brings people together. With its rich creaminess and buttery crust, this cheesecake is sure to impress at any gathering.
Whether enjoyed plain or dressed up with a fruit compote, this recipe provides a wonderful foundation for your culinary adventures. So gather your ingredients, embrace your inner chef, and relish the satisfaction that comes from crafting this timeless dessert.
Recipe Card
Butternut Squash Pasta with Sausage and Spinach Recipe
Ingredients
- 8 ounces pasta your choice
- 1 medium butternut squash peeled and cubed
- 1 pound Italian sausage mild or spicy
- 2 cups fresh spinach
- 1 onion diced
- 4 cloves garlic minced
- 1 teaspoon dried rosemary
- 1/2 cup grated Parmesan cheese
- Salt and pepper to taste
- 2 tablespoons olive oil
Instructions
- Preheat your oven to 400°F (200°C).
- Toss the cubed butternut squash in 1 tablespoon of olive oil, salt, and pepper. Spread on a baking sheet and roast for 25-30 minutes.
- Meanwhile, cook the pasta according to package instructions until al dente. Drain and set aside.
- In a large skillet, heat the remaining tablespoon of olive oil over medium heat. Add the diced onion and garlic, sauté until translucent.
- Add the Italian sausage to the skillet. Break it apart and cook until browned and cooked through.
- Stir in the roasted butternut squash, spinach, and rosemary into the skillet, cooking until the spinach wilts.
- Add the cooked pasta to the skillet and toss everything together. Sprinkle in the Parmesan cheese and mix until melted.
- Season with salt and pepper to taste, then serve warm.
Notes
Additional serving suggestions: pair with a crisp salad, garlic bread, or roasted seasonal vegetables for balance.
For make-ahead, prep components separately and assemble just before heating to preserve texture.
Taste and adjust with acid (lemon/vinegar) and salt right at the end to wake up flavors.
