Introduction
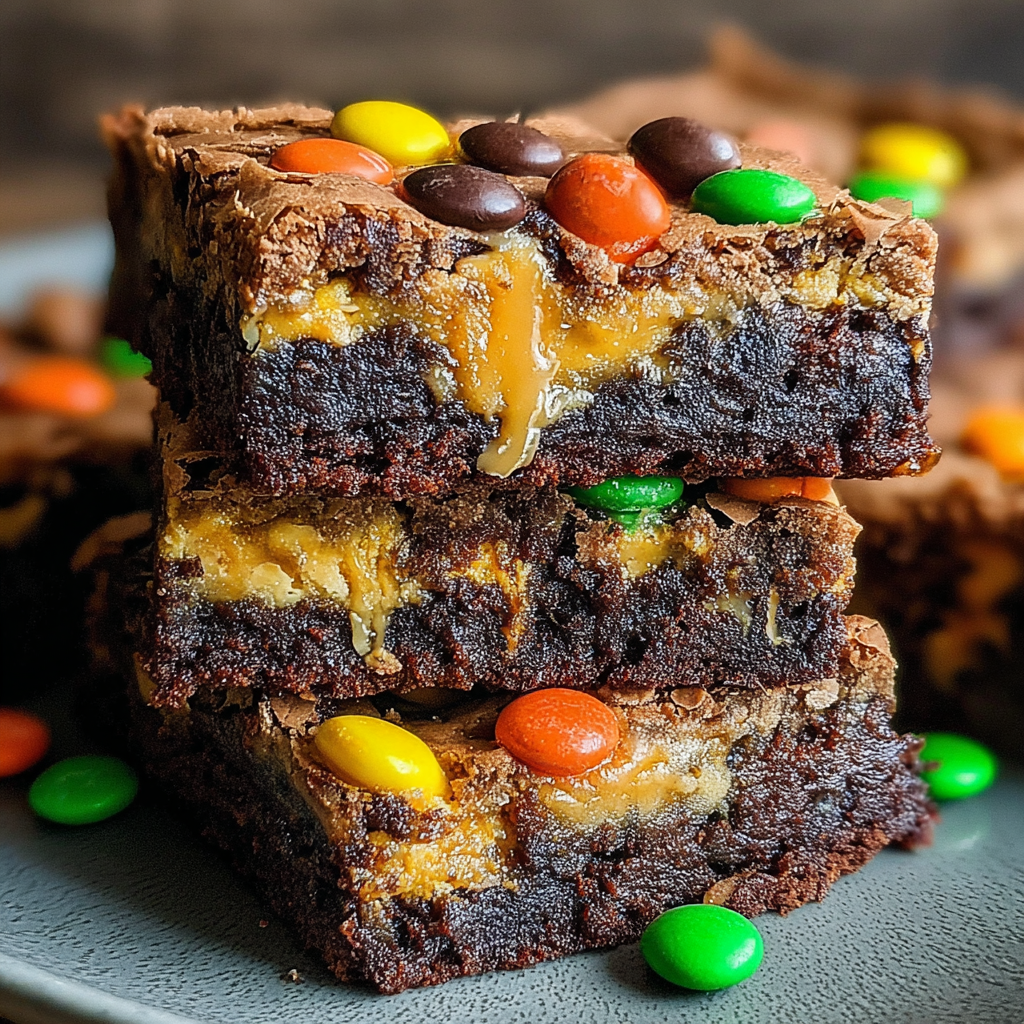
Every Halloween, the excitement of trick-or-treating often leaves us with a mountain of candy. Instead of letting those sugary treats sit in storage until next year, why not use them creatively in the kitchen? Leftover Halloween candy brownies are a fantastic way to breathe new life into those sweet remnants.
These brownies are not just a solution for utilizing candy; they also bring an explosion of flavors and textures to classic brownie recipes. Imagine rich, fudgy chocolate brownies studded with pieces of caramel, nougat, and crispy sweets. They are a delightful treat that is easy to prepare and sure to please both kids and adults alike.
In this article, we’ll explore how to make these crowd-pleasers, discussing the role of each ingredient while walking through the straightforward process. Let’s get cooking!
Ingredients
- 1 cup unsalted butter
Butter adds richness and moisture to the brownies, helping them achieve that fudgy texture. Using unsalted butter allows for better control over the overall saltiness of the dessert. - 2 cups granulated sugar
Sugar is essential for sweetness and also plays a significant role in the structure of these brownies. It helps create that delightful chewy texture by dissolving in the batter and caramelizing slightly when baked. - 4 large eggs
Eggs contribute to the structure and stability of the brownies. They also add moisture and richness, enhancing the overall flavor of the dessert. Beating the eggs until frothy introduces air, which helps in achieving a lighter texture. - 1 cup all-purpose flour
Flour is the primary dry ingredient that combines with the other components to create the brownie base. It gives the brownies their structure, ensuring they are not too dense or crumbly. - 1 cup cocoa powder
Cocoa powder provides the deep chocolate flavor that defines these brownies. It adds richness without adding much fat, balancing the sweetness of other ingredients. - 1 teaspoon vanilla extract
Vanilla extract enhances the overall flavor profile of the brownies, adding a note of warmth that complements the chocolate. It rounds out the sweetness, creating a more complex taste. - 1/2 teaspoon salt
Salt is essential to enhance the overall flavor of the brownies. A small amount helps to counteract sweetness and bring out the richness of chocolate. - 2 cups chopped Halloween candy
Your selection of Halloween candy can vary, but it should include a mix of textures and flavors—chocolate bars, gummy sweets, and caramel will create a fun and unexpected treat. This is the star of the recipe, transforming plain brownies into festive delights.
Directions & Preparation
Step 1: Preheat your oven to 350°F (175°C).
Preheating the oven ensures that the brownies start baking at the right temperature, which is crucial for achieving that perfect fudgy consistency. If you skip this step, the brownies might not rise correctly, leading to an uneven texture.
Step 2: Grease a 9×13 inch baking pan or line it with parchment paper.
Greasing the pan prevents the brownies from sticking, making cleanup easier and ensuring you can remove them without breaking. Parchment paper also helps in lifting the brownies out for even slicing.
Step 3: Melt the butter in a medium saucepan over low heat.
Melting the butter gently allows it to incorporate easily into the batter and helps prevent burning. This step ensures your brownies will have a smooth and consistent texture.
Step 4: Remove from heat and stir in sugar, eggs, and vanilla.
Mixing the sugar while the butter is still warm helps it dissolve more easily, creating a smoother batter. Adding the eggs one at a time ensures each egg is fully incorporated, preventing the mixture from separating.
Step 5: Sift together the flour, cocoa powder, and salt.
Sifting the dry ingredients reduces clumps and guarantees an even distribution of cocoa and flour throughout the batter. This ensures the brownies bake uniformly and enhances their texture.
Step 6: Gradually fold the dry ingredients into the wet mixture until just combined.
Mixing the ingredients until just combined helps prevent overworking the batter, keeping the brownies chewy rather than tough. It’s essential to see some floury spots before proceeding to the next step.
Step 7: Gently fold in the chopped Halloween candy.
Adding candy at this stage allows for random pockets of flavor throughout the brownies. Choose a mix of candies to create a exciting combination of textures and flavors in each bite.
Step 8: Pour the brownie batter into the prepared pan and spread it evenly.
Ensuring even distribution of the batter in the pan helps the brownies cook uniformly. This will prevent areas that are overcooked or undercooked, ensuring that every part of the brownie has the same texture.
Step 9: Bake for 25-30 minutes or until a toothpick inserted in the center comes out with a few moist crumbs.
The baking time can vary based on your oven, so it’s important to keep an eye on the brownies. The toothpick test helps you determine doneness; removing them while still slightly underbaked ensures a fudgy center.
Step 10: Allow the brownies to cool in the pan for at least 10 minutes before slicing.
Cooling the brownies in the pan helps them set further and makes slicing easier. If you attempt to cut them too soon, they may crumble, ruining your beautifully crafted dessert.

Choosing Your Candy Wisely
Not all Halloween candy is created equal, which is why selecting the right types can enhance your brownies. Chocolate bars work beautifully because they melt and create a deliciously gooey texture, while chewy candies add fun bursts of flavor. Look for a variety, including creamy, crunchy, and chewy candies, ensuring your brownies are both exciting and delectable.
Experimenting with Flavors
These brownies are a great opportunity for creativity in the kitchen. Feel free to mix in your favorite nuts or additional chocolate chips for an even richer texture. You can also vary the flavor innovations by introducing a pinch of spices like cinnamon or a splash of peppermint extract, allowing seasonal variations that keep this dessert fresh and exciting.
Perfect Pairings for Serving
While these brownies are a treat on their own, serving them with a scoop of vanilla ice cream or a dollop of whipped cream can push them over the top. The cold, creamy textures contrast beautifully against the warm, fudgy brownies, creating a delightful balance. For an extra festive touch, drizzle caramel or chocolate sauce over the top before serving.
FAQs
What should I do if my brownies are too thick?
If your brownie batter seems too thick, consider adding a tablespoon of milk or water to loosen it slightly. Just mix gently to incorporate without overworking the batter.
Can I use chocolate-covered candies instead of regular ones?
Absolutely! Chocolate-covered candies not only add sweetness but can also give added texture to the brownies. Just be mindful that they may melt into the batter more than regular candies.
Why did my brownies come out dry?
Dry brownies can be a result of overbaking or using too much flour. Always check your brownies a few minutes before the recommended baking time and ensure you measure out the flour accurately.
What if I want to reduce the sugar content?
You can experiment by reducing the sugar by up to 25% without affecting the texture significantly. Consider adding unsweetened applesauce as a substitute to keep moisture while cutting sugar.
Is it possible to use gluten-free flour in this recipe?
Yes, you can substitute all-purpose flour with a gluten-free flour blend. Just be sure that it’s a blend designed for baking to maintain texture.
How do I know when the brownies are done baking?
The best way to check doneness is to insert a toothpick in the center. If it comes out with a few moist crumbs, your brownies are perfectly baked.
Conclusion
Leftover Halloween candy brownies are not just a delicious way to clear out your candy stash; they also bring an element of fun to your baking. Incorporating candy creates unique flavor experiences that everyone will love.
By following this simple recipe and embracing creativity with your leftover treats, you can turn a common problem into a delightful dessert. Happy baking!
Recipe Card
Deliciously Simple Apple Slab Pie Recipe
Ingredients
- 2 ½ cups all-purpose flour
- 1 cup unsalted butter chilled and cubed
- 1 teaspoon salt
- ¼ cup granulated sugar
- 6 cups peeled and sliced apples such as Granny Smith and Honeycrisp
- ¾ cup brown sugar
- 1 teaspoon cinnamon
- 2 tablespoons cornstarch
- 1 tablespoon lemon juice
- 1 egg beaten (for egg wash)
Instructions
- Prepare the pie crust by mixing flour, salt, and sugar.
- Cut in the butter until the mixture resembles coarse crumbs.
- Add cold water slowly until the dough comes together.
- Preheat your oven to 375°F (190°C).
- Roll out the crust for the bottom layer and place it in a baking sheet.
- Prepare the apple filling by combining sliced apples with sugars, cinnamon, cornstarch, and lemon juice.
- Fill the crust with the apple mixture, fluffing it up.
- Roll out the top crust and place it over the apple filling.
- Brush the crust with the beaten egg.
- Bake for 45-55 minutes or until the filling is bubbly and the crust is golden.
- Let the pie cool before slicing.
Notes
Additional serving suggestions: pair with a crisp salad, garlic bread, or roasted seasonal vegetables for balance.
For make-ahead, prep components separately and assemble just before heating to preserve texture.
Taste and adjust with acid (lemon/vinegar) and salt right at the end to wake up flavors.
